Dial-Indicator - Meetklok
This equipment is safety category 6: Other equipment with no limits.
This equipment is Noise Category 3: Can be used at all hours. No limits.
 Handle with care.
This is a (precision) measurement tool with exact dimensions and straightness.
That means: handle it gently, don't hammer on it or use it as a crowbar and so on.
(if you need a crowbar - these are wonderful for that!)
It is very important that if you accidentally drop it or think it may be out of line
- either mark the tool very clearly...
- or report this to the mailing list...
...so that your fellow makers do not ruin their work.
vermist!
vermist !
Nieuw Oct/2021


We have several dial indicators in the metal woodshop. Consult http://www.mini-lathe.com/Measurement/Dial_indicators/Dial_indicators.htm or youtube for countless videos on how to use them. Or ask someone to show you.
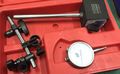
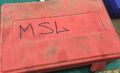
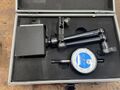
I've you've never used these before (or are in doubt which one to use) then use the one in the big red box. It is the easiest and most versatile.
Inhoud
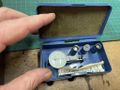
New dial indicator


Note that the new dial indicator has a small gib to also use the thinner size clock.
Dark blue Mitutoyo Plunger Dial Indicator
This indicator has thumbscrew to lock the dial legend (pink arrow in image below). Do NOT overtighten this bolt; it will 'lift' the entire ring forward. And with it; the legend under the dial. This in turn then blocks the hand or cause slippage.

See https://www.youtube.com/watch?v=1hZ3FVud2Bo for the (dis)assembly instructions (AKA do not just unscrew any screw in sight).
location
Bottom drawer blue cabinet.
On Loan
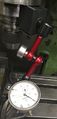
- Red-arm Dirk-Willem van Gulik.
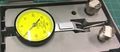
- Gray boxed lever indicator: Aart.
History
| Datum | Wat |
|---|---|
| Nov 2020 | The small lever indicator and the black dial indicator where donated |
| Aug 2021 | Rode doos met dial clock is verdwenen. |
| Oct 2021 | Nieuwe meetklok met betere stand |
| Dec 2023 | Mitutoyo met blauwe rand liep aan; verholpen door dis/re-assembly (DW) |
Repair
The thread on the M6 bolt holding the indicator on the arm (lower left in first picture) was gone. TIG-welded extra metal onto the damaged thread, ground/turned it to 6mm, re-cut M6 thread (20191226, AlexY)