Project Radar Boards Schiphol Control: verschil tussen versies
(→Code) |
|||
| Regel 15: | Regel 15: | ||
[[Bestand:schiphol-first-light.mov|320px]] | [[Bestand:schiphol-first-light.mov|320px]] | ||
<tabs> | <tabs> | ||
| − | <tab name = "board 50228 | + | <tab name = "board 50228"> |
= Schiphol Airtraffic Control displays = | = Schiphol Airtraffic Control displays = | ||
| Regel 211: | Regel 211: | ||
Progamming cable ATMEL [[Bestand:atmel-isp-pinout.png|180px]] to which this needs to be connected. | Progamming cable ATMEL [[Bestand:atmel-isp-pinout.png|180px]] to which this needs to be connected. | ||
| + | </tab> | ||
| + | <tab name = "board 50229"> | ||
| + | Similar to 50228, but with 16 displays instead of 6. Also has 15 extra buttons, each with a LED underneath. Has a ATMEGA162 instead of the '161 of the 50228. etc. | ||
| + | |||
| + | =display control= | ||
| + | placeholder | ||
| + | |||
| + | = reading the buttons = | ||
| + | The 15 buttons are in a 4x4 matrix. The brightness up / down switches connect to the same pins. Every switch is between two MCU pins. | ||
| + | |||
| + | * Brightness up: between PD2 and PB3. | ||
| + | * Brightness down: between PD4 and PD5. | ||
| + | |||
| + | {| class="wikitable" | ||
| + | |- | ||
| + | | row/col || '''PD2''' || '''PD3''' || '''PD4''' || '''PD5''' | ||
| + | |- | ||
| + | | '''PB3''' || UP || WIS || RVR || RD 06 | ||
| + | |- | ||
| + | | '''PB2''' || 22 || 27 || 36R || 06 | ||
| + | |- | ||
| + | | '''PB1''' || 36L || 18L || 18R || CLR | ||
| + | |- | ||
| + | | '''PB0''' || 4 || 3 || 2 || 1 | ||
| + | |} | ||
| + | Text on the buttons taken from board 50.229 no 17. Might differ on other board. | ||
| + | (TODO: add picture. Description: Top to botom 1,2,3,4, then under 4 is CLR and left to right 18R,18L,36L,06,36R,27,22,RD 06, RVR, WIS.) | ||
| + | |||
| + | Read as any other keyboard matrix (? Enable pull-ups on input row/col s & unused col/row and drive one col/row low ?) | ||
| + | |||
| + | = setting the LEDs = | ||
| + | placeholder | ||
| + | |||
| + | = Other things = | ||
| + | The button caps can be carefully removed to replace the text. | ||
| + | |||
</tab> | </tab> | ||
<tab name = "board 50.028"> | <tab name = "board 50.028"> | ||
Versie van 21 jun 2021 om 22:05
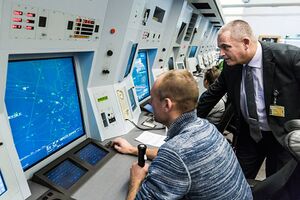
We got a [pile of Control Tower displays from Schiphol airport (or Eurocontrol, etc)] used for tracking what is in the air.
They are basically small 2-3 CPU boards on a common RS 485 bus or on RS 232. One CPU is purely for programming. The other is the main board and handles the traffic on the bus (it may be ASTERIX format?) and the other handles the display. They are interconnected by a TTL serial on 9600 8N1. Each box also contains a high quality PSU.
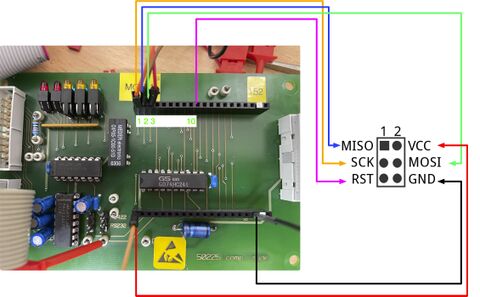
The programming chip is also 9600 8N1 and contains some debugging tooling. Photo below shows the testpoints used for programming.
But easiest may be to use normal ATMEL programmeing on MISO/MOSI - which are nicely broken out on the connector.
Code
Some fairly functional code: https://github.com/MakerSpaceLeiden/AirtrafficControlDisplaysSchiphol
Bestand:Schiphol-first-light.mov
Schiphol Airtraffic Control displays
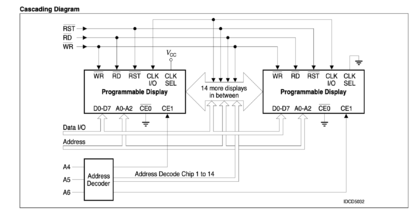
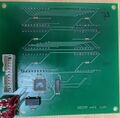
Seems to be the reference circuit from the display datasheet with an Atmel161:
With an SNx4HC138 3 line to 8 line decoder/demux used. De displays zijn niet op alle borden gelijk - maar wel uit de zelfde serie en aansturing.
De 50229 boardjes met 16 displays hebben twee MUX-es - waarbij de hoogste (#7, H/H/H) de doorgaat naar de tweede MUX.
Boards
Main connector
| 1 NC | 2 NC |
| 3 NC | 4 NC |
| 5 ? | 6 ? |
| 7 RST | 8 SCK |
| 9 MISO | 10 MOSI |
| 11 RX | 12 TX |
| 13 SS | 14 Vdd |
| 15 Vdd | 16 ? |
| 17 ? | GND |
| GND | GND |
Multiplexer
HC138 is een multiplexer (https://www.ti.com/lit/ds/symlink/sn74hc138.pdf?ts=1623312092250&ref_url=https%253A%252F%252Fwww.google.com%252F)
Pin 1,2,3 zijn de selects. 4,5 enables, G1 de active high
ABC worden alleen gebruikt - en schakelen het display
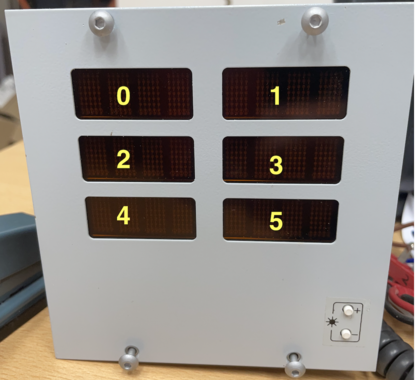
Multiplexer numbering
ATMEGA 161L
See also https://github.com/MakerSpaceLeiden/AirtrafficControlDisplaysSchiphol/blob/main/pins.h -- which has been tested against the actual board.
| 1 | MOSI - pin 9 connector |
| 2 | MISO - pin 10 connector |
| 3 | SCK - pin 8 connector |
| 4 | RST - pin 7 connector |
| 5 | RX - pin 11 connector |
| 6 | NC |
| 7 | TX - pin 12 connector |
| 8 | Brightness up to ground |
| 9 | Brightness down to ground |
| 10 | |
| 11 | |
| 12 | pin 10 display WR |
| 13 | pin 1 display RD |
| 14 | |
| 15 | |
| 16 | |
| 17 | |
| 18 | pin 9 display A0 |
| 19 | pin 8 display A1 |
| 20 | pin 7 display A2 |
| 21 | MCP 1 - 'A' select |
| 22 | MCP 2 - 'B' select |
| 23 | MCP 3 - 'C' select |
| 24 | pin 5 display CE1 |
| 25 | |
| 26 | pin 4 display RST |
| 27 | |
| 28 | |
| 29 | |
| 30 | pin 11 display D7 |
| 31 | pin 12 display D6 |
| 32 | pin 13 display D5 |
| 33 | pin 14 display D4 |
| 34 | pin 15 display D3 |
| 35 | pin 16 display D2 |
| 36 | pin 17 display D1 |
| 37 | pin 18 display D0 |
| 38 | VCC |
| 39 | |
| 40 | |
| 41 | |
| 42 | |
| 43 | |
| 44 | SS - pin 13 connector |
Display
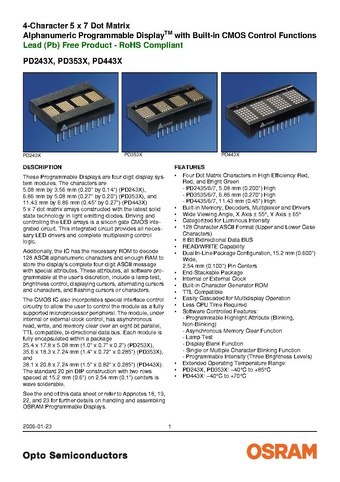
The various cards contains displays from the PD family.
Multiplexer numbering
Datasheet displays
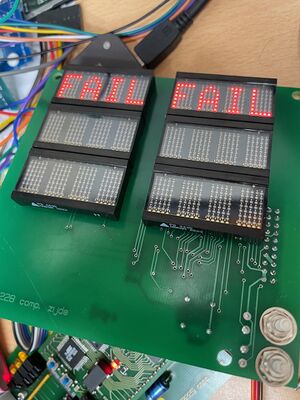
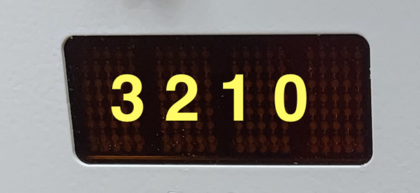
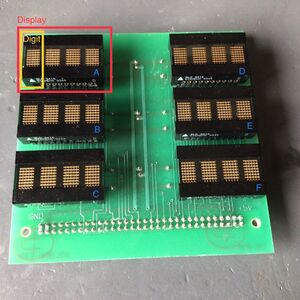
The photo's are from the card with the 6 displays of type PD443.
Various people hack them
- https://www.flickr.com/photos/okini393939/5148872258
- https://github.com/TiNredmc/PD443X_Lib
- https://github.com/TiNredmc/PD443Xclock
Main Board
Connection on the main bord - top row near the yellow 'TOP1' label.
Wiring / pinout main CPU board
| TOP 1 | SCK of CPU display board |
| TOP 2 | MISO of CPU display board |
| TOP 3 | MOSI of CPU display board |
| TOP 10 | RST of CPU display board |
| TOP 13,14 | TX/RX of CPU display board |
| BOT far left/right | Power |
Similar to 50228, but with 16 displays instead of 6. Also has 15 extra buttons, each with a LED underneath. Has a ATMEGA162 instead of the '161 of the 50228. etc.
display control
placeholder
reading the buttons
The 15 buttons are in a 4x4 matrix. The brightness up / down switches connect to the same pins. Every switch is between two MCU pins.
- Brightness up: between PD2 and PB3.
- Brightness down: between PD4 and PD5.
| row/col | PD2 | PD3 | PD4 | PD5 |
| PB3 | UP | WIS | RVR | RD 06 |
| PB2 | 22 | 27 | 36R | 06 |
| PB1 | 36L | 18L | 18R | CLR |
| PB0 | 4 | 3 | 2 | 1 |
Text on the buttons taken from board 50.229 no 17. Might differ on other board. (TODO: add picture. Description: Top to botom 1,2,3,4, then under 4 is CLR and left to right 18R,18L,36L,06,36R,27,22,RD 06, RVR, WIS.)
Read as any other keyboard matrix (? Enable pull-ups on input row/col s & unused col/row and drive one col/row low ?)
setting the LEDs
placeholder
Other things
The button caps can be carefully removed to replace the text.
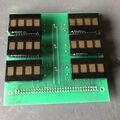
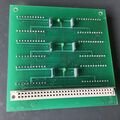
Dit is het board met 6 rode displays en een panduit 64-pins connector. Er zit geen "slimmigheid" (logica of mcu) op dit board.
De displays op dit board zijn van het type DLO3416 datasheet. Deze hebben 6 datalijnen, een !WR lijn die aangeeft wanneer deze datalijnen gelezen moeten worden, 2 adreslijnen die aangeven welk van de 4 digits wordt aangestuurd, en 4 chip-enable lijnen die gebruikt kunnen worden om individuele displays aan te sturen. CE1 en CE2 zijn actief hoog, !CE3 en !CE4 zijn actief laag, op die manier kan door lijnen samen te nemen adressering gedaan worden.
Op het 50.028 board zitten de diverse Chip Enable lijnen dus ook aan elkaar op een manier dat adressering van de 6 individuele displays mogelijk is.
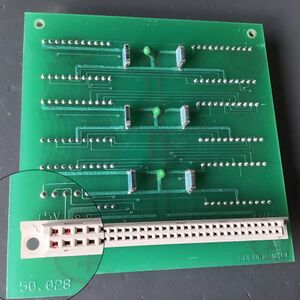
Ik reken de plek waar een "P" in de connector staat als pin 1, en tel vervolgens als volgt:
| 1 | 3 | 5 | ... | 63 |
| 2 | 4 | ... | 62 | 64 |
De pin-out wordt dan: (Let op, nog niet gecontroleerd! Dit is met een multimeter uitgepiept maar ik heb het display nog niet aangesloten/aangestuurd). Pinnen die aan elkaar zitten hebben 1 rij in de tabel. Pinnen die niet verboden zijn, zijn weggelaten. Voor de chip-enable lijnen is een eigen tabel
| pin(nen) | Display-pinfunctie |
|---|---|
| 1,2,3,4 | 5 V voeding |
| nc pinnen! | |
| 7,8 | !CLR (van alle displays samen) |
| 9,10 | !WR (van alle displays samen) |
| 11,12 | A1 (van alle displays samen) |
| 13,14 | A0 (van alle displays samen) |
| 15,16 | Chip enable, zie andere tabel (CE2 E,B,D ; !CE4 A,C,F) |
| 17,18 | Chip enable, zie andere tabel (CE1 D ; CE2 B ; !CE3 A ; !CE4 E,B) |
| 19,20 | Chip enable, zie andere tabel (CE1 B,F ; CE2 A; !CE3 C,E ; CE4 D) |
| 21,22 | Chip enable, zie andere tabel (CE1 A,C,E ; !CE3 B,D,F) |
| 23,24 | CU (cursor select) (van alle displays samen) |
| 25,26 | CUE (Cursor select) (van alle displays samen) |
| 27,28 | D6 (van alle displays samen) |
| 29,30 | D5 (van alle displays samen) |
| nc pinnen! | |
| 33,34 | D4 (van alle displays samen) |
| 35,36 | D3 (van alle displays samen) |
| 37,38 | D2 (van alle displays samen) |
| 39,40 | D1 (van alle displays samen) |
| 41,42 | D0 (van alle displays samen) |
| 43 | BL (blanking) F |
| 44 | BL (blanking) D |
| 45 | BL (blanking) B |
| 46 | BL (blanking) E |
| 47 | BL (blanking) C |
| 48 | BL (blanking) A |
| NC pinnen! | |
| 61,62,63,64 | GND |
Waarbij de adressering van de displays overzichtelijker te zien is als je het als volgt weergeeft:
| display | 15 | 17 | 19 | 21 |
|---|---|---|---|---|
| A | L | L | H | H |
| B | H | L | H | H |
| C | L | H | L | H |
| D | H | H | L | H |
| E | H | L | L | H |
| F | L | H | H | H |
De displays op de print zijn hierbij genummerd als
| A | B |
| C | D |
| E | F |
De displays zijn dus te adresseren door middel van de adreslijnen op pinnen 15,17,19,21 (chip enable lijnen). De digits binnen een display door middel van de A0 en A1 adreslijnen.
TODO. Dit is het board met de 74xx logica via een flatcable verbonden met een displayprint met 10 groene displays.
