Node TigWelder: verschil tussen versies
(→Solenoid Wiring) |
|||
| (38 tussenliggende versies door 2 gebruikers niet weergegeven) | |||
| Regel 1: | Regel 1: | ||
| − | [[Category: | + | [[Category:Nodes & network devices]][[Category:WhiteNode]] |
| − | [[ | + | [[Bestand:Nodetig.jpg|miniatuur]] |
| + | [[Bestand:Nodetiginside.jpg|miniatuur]] | ||
| − | [[PowerNode White|PoE powered Node]] on AC voor de [[ | + | [[PowerNode White|PoE powered Node]] on AC voor de [[TIG Welder / Lasapparaat]]. |
| + | |||
| + | {| class="wikitable" | ||
| + | |- | ||
| + | | IP address || 192.168.6.150 | ||
| + | |- | ||
| + | | hardware ethernet || 08:d1:f9:91:ce:b8 | ||
| + | |- | ||
| + | | Logging || telnet, serial, http, mqtt, syslog | ||
| + | |} | ||
| + | |||
= Normal operation = | = Normal operation = | ||
| Regel 17: | Regel 28: | ||
# Turn off with the switch on the front | # Turn off with the switch on the front | ||
| − | # Close the main Values on top of the gas bottle. | + | # Close the main Values on top of the gas bottle. The node beeps to remind you to do so. |
| − | + | ## Node will stop beeping once you've closed the valve. | |
| − | ## Node will stop beeping. | ||
# Check the pressure | # Check the pressure | ||
## If it is below XXX - arrange for a replacement bottle and report this to the mailing list. | ## If it is below XXX - arrange for a replacement bottle and report this to the mailing list. | ||
| Regel 26: | Regel 36: | ||
= Bypassing the node = | = Bypassing the node = | ||
| + | [[Bestand:Bypass-dipaswitch.jpg|miniatuur|Bypass dip switch]] | ||
| + | With the explicit permission from a trustee - a node can be bypassed. For example when it is broken. | ||
| − | + | There is a red dip switch on the back of the board; near the AC/DC transformer and the fuse. | |
| + | |||
| + | Placing it in the ''''on' position''' will bypass the node (i.e. to the left in the picture); and provided power to the TIG and the shutoff valve. | ||
| − | + | I.e. the on-off button on the front of the welder can then be used as if there is no node. | |
Obviously - doing so without the express permission is a sure way to loose your membership. | Obviously - doing so without the express permission is a sure way to loose your membership. | ||
| Regel 35: | Regel 49: | ||
= Trouble Shooting = | = Trouble Shooting = | ||
| − | Check what is on the display. | + | Check what is on the display. The first QR code will bring you to this page. The second QR code will show you the logs in a browser. You can also telnet to the IP address shown in the 'MORE' display to see the log in real time. |
| + | |||
| + | See [[PowerNode White|this page]] for more details. | ||
== No Gas ?! == | == No Gas ?! == | ||
| Regel 41: | Regel 57: | ||
# Are BOTH valves open ? | # Are BOTH valves open ? | ||
# Do the meters show pressure | # Do the meters show pressure | ||
| − | ## If not - you've ran out of gas. Arrange for a replacement -and- report to the mailing list. [[Pressure Vessel Limit|Be wary of the 125L limit]]. | + | ## If not - you've ran out of gas. Arrange for a replacement -and- report to the mailing list. [[Gas Bottle Pressure Vessel Limit|Be wary of the 125L limit]]. |
== Swipe ok - but does not want to turn on == | == Swipe ok - but does not want to turn on == | ||
# Do you see '''waiting for card''' on the display ? If so - it has not read your card (yet). | # Do you see '''waiting for card''' on the display ? If so - it has not read your card (yet). | ||
| − | # Did you hear | + | # Did you hear one or more beebs when you swiped ? If so - your card is picked up ok ? |
| − | # Did you hear 3 or more beeps when you swiped ? If so - your card is not getting permission from the system | + | |
| − | # Does your personal page in [https://mijn.makerspaceleiden.nl mijn.makerspaceleiden.nl] show that you have permission ? | + | If you hear beebs: |
| − | # Is the internet in the space up and running | + | |
| + | # Did you hear 3 or more beeps when you swiped ? If so - your card is not getting permission from the system. | ||
| + | ## Does your personal page in [https://mijn.makerspaceleiden.nl mijn.makerspaceleiden.nl] show that you have permission ? | ||
| + | # Did you get your permissions quite recently ? | ||
| + | ## Is the internet in the space up and running (as it only periodically updates its database). | ||
== The Machine does not want to accept my badge == | == The Machine does not want to accept my badge == | ||
| − | # Do you hear a beeb when swiping ? If so - it has read your card. | + | # Do you hear a beeb when swiping ? If so - it has read your card -- and see above issues. |
| + | |||
| + | If it did not beeb: | ||
| + | |||
# Did it work on the door ? | # Did it work on the door ? | ||
# Does it work on any other machine ? | # Does it work on any other machine ? | ||
| + | |||
| + | If so - your badge is fine - but we may have a broken ACNode or a broken reader. Report this to the mailing list - or if you know a little of IT and electronics - go to the troubleshooting section and connect to the log via your webbrowser or via telnet. Then swipe again and see what really happens. | ||
| + | |||
| + | Note that we are, at this time, not sure if these nodes will survive the welding area. | ||
= Resetting the Node = | = Resetting the Node = | ||
| Regel 62: | Regel 89: | ||
Wait about 10 seconds until you try again. | Wait about 10 seconds until you try again. | ||
| − | |||
| − | |||
| − | |||
| − | |||
| − | |||
| − | |||
= Electronics = | = Electronics = | ||
| − | [[Bestand:Nodetigschematics. | + | [[Bestand:Nodetigschematics.jpg|400px|miniatuur|TIG AC Node, schematics]] |
De node is AC powered; en zit 'voor' alle electra van het TIG apparaat. De sense-stekker op het apparaat kan losgekoppeld worden zonder dat dit de functionaliteit van het apparaat verandert. | De node is AC powered; en zit 'voor' alle electra van het TIG apparaat. De sense-stekker op het apparaat kan losgekoppeld worden zonder dat dit de functionaliteit van het apparaat verandert. | ||
| Regel 92: | Regel 113: | ||
== Solenoid Wiring check valve == | == Solenoid Wiring check valve == | ||
| − | [[Bestand:Valve-solenoid-current-reduce.jpg| | + | [[Bestand:Valve-solenoid-current-reduce.jpg|200px|12V solenoid with on-current reducer]] |
The 12V solenoid uses about 0.5 Amp/6Watt when fully engaged. This makes it relatively hot; and also is a stretch for the [https://nl.aliexpress.com/item/4000990068206.html AC/DC power unit] used. So after a high on-peak current- we reduce this to about 1/3 once engaged with a resistor. See https://www.electronicdesign.com/technologies/analog/article/21798400/whats-all-this-solenoid-driver-stuff-anyhow for details. | The 12V solenoid uses about 0.5 Amp/6Watt when fully engaged. This makes it relatively hot; and also is a stretch for the [https://nl.aliexpress.com/item/4000990068206.html AC/DC power unit] used. So after a high on-peak current- we reduce this to about 1/3 once engaged with a resistor. See https://www.electronicdesign.com/technologies/analog/article/21798400/whats-all-this-solenoid-driver-stuff-anyhow for details. | ||
| Regel 104: | Regel 125: | ||
== Board jumpers and settings == | == Board jumpers and settings == | ||
| − | Board | + | === Board 2 === |
# Rework 1 - verwijderen ESD diodes antenne | # Rework 1 - verwijderen ESD diodes antenne | ||
# Rework 2 - omdraaien transistors programmering | # Rework 2 - omdraaien transistors programmering | ||
| + | # Increased OPTO1/2 resistors to 4x68k to reduce heat / bring in spec | ||
| + | # 0-ohm (jumpering) R109 removed; 5V of USB not connected to 5V rail. | ||
| − | + | === Board 4 === | |
| + | |||
| + | # Rework 1 - verwijderen ESD diodes antenne | ||
| + | # Rework 2 - omdraaien transistors programmering | ||
| + | # 0-ohm (jumpering) R109 removed; 5V of USB not connected to 5V rail. | ||
| + | # Een van de program-transistors is vervangen door iets willekeurigs omdat de juiste wegsprong tijdens het solderen | ||
=== Jumpers: === | === Jumpers: === | ||
| Regel 117: | Regel 145: | ||
# Vpoe - Off | # Vpoe - Off | ||
# Vpoe5 - Slow Start | # Vpoe5 - Slow Start | ||
| − | # Out1 - Direct | + | # Out1 - Direct (and wired to 12V/digital out) |
| − | # Out2 - | + | # Out2 - joined N |
| + | # N cross connect of OPTO1 | ||
We are feeding the 3v3 via the 5 volt from the POE made by the 12 volt; this way the 3v3 stays cooler. As it does not have to do the 12->3.3 V in one step. | We are feeding the 3v3 via the 5 volt from the POE made by the 12 volt; this way the 3v3 stays cooler. As it does not have to do the 12->3.3 V in one step. | ||
| Regel 124: | Regel 153: | ||
=== Special Wiring === | === Special Wiring === | ||
| − | The MOSFET 12 volt DC of OUT1 is wired to the C/NO of the relay output; so pin | + | The MOSFET 12 volt DC of OUT1 is wired to the C/NO of the relay output; so pin 14 & 15 of the big green connector carry the 12 volt and can be wired directly to the SSR and the cut-off Valve. |
| + | |||
| + | == Testing the electronics | ||
| + | |||
| + | A small 'TIG simulator' was build to test the electronics. | ||
| + | |||
| + | [[Bestand:tig-simul-front.jpg|100px|TIG Simulator, front]] | ||
| + | [[Bestand:tig-simul-back.jpg|100px|TIG Simulator, back]] | ||
| + | [[Bestand:tig-simul-schem.jpg|100px|TIG Simulator, schematics]] | ||
== Connectors == | == Connectors == | ||
=== Green Connector === | === Green Connector === | ||
| + | [[Bestand:nodetig-connector.jpg|miniatuur|Node tig, connector]] | ||
{| class="wikitable" | {| class="wikitable" | ||
| Regel 139: | Regel 177: | ||
| 3 || OPTO 4 || NC | | 3 || OPTO 4 || NC | ||
|- | |- | ||
| − | | 4 || OPTO 3 || | + | | 4 || OPTO 3 || NC |
|- | |- | ||
| 5 || OPTO 2 || Voltage sense post on/off switch | | 5 || OPTO 2 || Voltage sense post on/off switch | ||
| Regel 145: | Regel 183: | ||
| 6 || OPTO 2 || N from TIG welder, post on/off switch | | 6 || OPTO 2 || N from TIG welder, post on/off switch | ||
|- | |- | ||
| − | | 7 || OPTO 1 || | + | | 7 || OPTO 1 || Torch/solenoid sense & output (from pin 14) |
|- | |- | ||
| − | | 8 || OPTO 1 || | + | | 8 || OPTO 1 || NC - solder jumper to N of power (Pin 10) |
|- | |- | ||
| 9 || L input || L, connected, from plug | | 9 || L input || L, connected, from plug | ||
| Regel 153: | Regel 191: | ||
| 10 || N input || N, connected, from plug | | 10 || N input || N, connected, from plug | ||
|- | |- | ||
| − | | 11 || Relay | + | | 11 || Relay 1 NO || 12 volt DC out to SSR & cutout valve |
|- | |- | ||
| − | | 12 || Relay | + | | 12 || Relay 1 Common || 12 volt out to SSR & cutout valve |
|- | |- | ||
| − | | 13 || Relay | + | | 13 || Relay 1 NC || NA |
|- | |- | ||
| − | | 14 || Relay 1 NC || | + | | 14 || Relay 1 NC || To Torch/solenoid, wire to Torch/solenoid sense (pin 7) |
|- | |- | ||
| − | | 15 || Relay 1 common || | + | | 15 || Relay 1 common || NA; solder jumper to N of power (Pin 10) |
|} | |} | ||
| Regel 177: | Regel 215: | ||
=== Sense Connector === | === Sense Connector === | ||
| − | + | [[Bestand:Nodetig-aansl.jpg|miniatuur]] | |
{| class="wikitable" | {| class="wikitable" | ||
|- | |- | ||
| − | ! PIN !! | + | ! PIN !! Inside Tig !! Wire !! Inside Node !! to !! Use |
|- | |- | ||
| − | | 1 || | + | | 1 || Black || Brown || Purple || N opto 2,3,4 || common |
|- | |- | ||
| − | | 2 || Red | + | | 2 || Blue|| Red || Red || Opto1 & OUT2 || Solenoid sense/control; against feeding N |
|- | |- | ||
| − | | 3 || | + | | 3 || Green || Blue || Green || Opto 2 ||Power sense; against common/1 |
|- | |- | ||
|} | |} | ||
| Regel 202: | Regel 240: | ||
* Holes at 125; 7.5mm from top/bottom | * Holes at 125; 7.5mm from top/bottom | ||
* Self tapping /parkers for plastic - hole is 3.2mm diameter; max length 6mm. | * Self tapping /parkers for plastic - hole is 3.2mm diameter; max length 6mm. | ||
| + | |||
| + | With a 3D printed spacer for some extra distance/shielding (https://www.thingiverse.com/thing:6782493). | ||
== Ontwerp overwegingen == | == Ontwerp overwegingen == | ||
| Regel 232: | Regel 272: | ||
{| class="wikitable" | {| class="wikitable" | ||
| + | |- | ||
| + | | Back v1.11 node board || ~35 | ||
| + | |- | ||
| + | | ESP32 || ~3.50 | ||
| + | |- | ||
| + | | Big green Connector|| ~1.50€ | ||
| + | |- | ||
| + | | RJ45 connector || ~0.10 | ||
|- | |- | ||
| 220AC/DC 12V || ~2€ | | 220AC/DC 12V || ~2€ | ||
|- | |- | ||
| Solenoid 12V || ~9€ | | Solenoid 12V || ~9€ | ||
| − | |||
| − | |||
|- | |- | ||
| OLED display || ~3.50€ | | OLED display || ~3.50€ | ||
| Regel 245: | Regel 291: | ||
| [https://nl.aliexpress.com/item/4000085227082.html Solid state relay, 40A] || ~7.82€ | | [https://nl.aliexpress.com/item/4000085227082.html Solid state relay, 40A] || ~7.82€ | ||
|- | |- | ||
| − | | 12v coil relay; switch 240ACV/3A | + | | 12v coil relay; switch 240ACV/3A || free, donated to MSL |
|- | |- | ||
| 150x150 enclosure with transparant lid || ~9.00€ | | 150x150 enclosure with transparant lid || ~9.00€ | ||
| Regel 257: | Regel 303: | ||
| 2 wire SSR cable & socket || 0.25 € | | 2 wire SSR cable & socket || 0.25 € | ||
|- | |- | ||
| − | | 4 long bolts | + | | 4 long bolts || 0.80 € |
|- | |- | ||
| − | | Assorted ferrules | + | | Assorted ferrules || free, from space stock |
|- | |- | ||
| − | | Board with capacitor/resistor for hold-current suppression | + | | Board with capacitor/resistor for hold-current suppression || free, donated to MSL |
|- | |- | ||
|} | |} | ||
De electra kabel is 2m; de slang ruim 1m50. | De electra kabel is 2m; de slang ruim 1m50. | ||
| + | |||
| + | = TODO = | ||
| + | |||
| + | # Ferules/aderhulzen om netkabel in node (6x'dik') | ||
| + | # Faston/kabelschoentjes met extra doorlushaakje voor on-off sense | ||
= History = | = History = | ||
Build late 2024 | Build late 2024 | ||
Huidige versie van 22 dec 2024 om 16:50


PoE powered Node on AC voor de TIG Welder / Lasapparaat.
| IP address | 192.168.6.150 |
| hardware ethernet | 08:d1:f9:91:ce:b8 |
| Logging | telnet, serial, http, mqtt, syslog |
Inhoud
[verbergen]Normal operation
Turn ON
- Check both pressure dials. They should both show pressure.
- If not - they may be empty and someone before you may have not bothered to replace the bottle. Baad. Check by turning the welder on and trying to weld.
- If that works - then you may have to fix the leak or report this to the mailing list - so it can be fixed.
- Swipe tag
- Turn on with the switch on the front
- Open main valve on top of the gas bottle.
Turn OFF
- Turn off with the switch on the front
- Close the main Values on top of the gas bottle. The node beeps to remind you to do so.
- Node will stop beeping once you've closed the valve.
- Check the pressure
- If it is below XXX - arrange for a replacement bottle and report this to the mailing list.
Do not unplug the welder; leave the power cable in the wall socket. We use this to track gas leaking and usage.
Bypassing the node

With the explicit permission from a trustee - a node can be bypassed. For example when it is broken.
There is a red dip switch on the back of the board; near the AC/DC transformer and the fuse.
Placing it in the 'on' position will bypass the node (i.e. to the left in the picture); and provided power to the TIG and the shutoff valve.
I.e. the on-off button on the front of the welder can then be used as if there is no node.
Obviously - doing so without the express permission is a sure way to loose your membership.
Trouble Shooting
Check what is on the display. The first QR code will bring you to this page. The second QR code will show you the logs in a browser. You can also telnet to the IP address shown in the 'MORE' display to see the log in real time.
See this page for more details.
No Gas ?!
- Are BOTH valves open ?
- Do the meters show pressure
- If not - you've ran out of gas. Arrange for a replacement -and- report to the mailing list. Be wary of the 125L limit.
Swipe ok - but does not want to turn on
- Do you see waiting for card on the display ? If so - it has not read your card (yet).
- Did you hear one or more beebs when you swiped ? If so - your card is picked up ok ?
If you hear beebs:
- Did you hear 3 or more beeps when you swiped ? If so - your card is not getting permission from the system.
- Does your personal page in mijn.makerspaceleiden.nl show that you have permission ?
- Did you get your permissions quite recently ?
- Is the internet in the space up and running (as it only periodically updates its database).
The Machine does not want to accept my badge
- Do you hear a beeb when swiping ? If so - it has read your card -- and see above issues.
If it did not beeb:
- Did it work on the door ?
- Does it work on any other machine ?
If so - your badge is fine - but we may have a broken ACNode or a broken reader. Report this to the mailing list - or if you know a little of IT and electronics - go to the troubleshooting section and connect to the log via your webbrowser or via telnet. Then swipe again and see what really happens.
Note that we are, at this time, not sure if these nodes will survive the welding area.
Resetting the Node
Unplug the main power cable of the welder from the wall scocket, wait 10 seconds and then re-seat it.
Wait about 10 seconds until you try again.
Electronics

De node is AC powered; en zit 'voor' alle electra van het TIG apparaat. De sense-stekker op het apparaat kan losgekoppeld worden zonder dat dit de functionaliteit van het apparaat verandert.
Het SSR relay onderbreekt de spanning naar de on/off schakelaar. De stuurstroom van dit SSR schakelt ook shutoff valve.
OPTO1 wordt gebruikt om spanning na de on/off switch the detecteren.
OPTO2 wordt gebruikt om de spanning op de solenoid te detecteren die in het tig apparaat de gas toevoer naar de toorts regelt.
De tweede output wordt gebruikt om de solenoide binnen in het tig apparaat open te zetten.
De node is gebaseerd op de Black 2025 boards. Machine specific wiring:
- SSR relay voor power; stuurstroom 12v - ook gebruikt voor de shutoff valve
- Relay voor 220v solenoid in de machine.
- Opto voor spanning detectie main on/off schakelaar
- Opto voor detectie solenoid spanning (220v)
- XGZP6847D i2c pressure sensor (0-1 MPa / 0-10 Bar)
Solenoid Wiring check valve

The 12V solenoid uses about 0.5 Amp/6Watt when fully engaged. This makes it relatively hot; and also is a stretch for the AC/DC power unit used. So after a high on-peak current- we reduce this to about 1/3 once engaged with a resistor. See https://www.electronicdesign.com/technologies/analog/article/21798400/whats-all-this-solenoid-driver-stuff-anyhow for details.
Solenoid Wiring torch valve
The 220 VAC torch valve is normally controlled by a relay from the N/L post the on/off switch. This has been changed to a before the switch; to allow (extra) control from the node when the device is completely powered off.
From a safety perspective this breaks the assumption that the welder is fully off if the on-off switch is off. The Solenoid itself is potentially powered if the SSR relay is powered on. And the 'N' is connected (as would the circuit be if it was normally plugged in). This is compensated by a label on the back of the machine with a warning; with a similar label on the solenoid & its wiring.
Board jumpers and settings
Board 2
- Rework 1 - verwijderen ESD diodes antenne
- Rework 2 - omdraaien transistors programmering
- Increased OPTO1/2 resistors to 4x68k to reduce heat / bring in spec
- 0-ohm (jumpering) R109 removed; 5V of USB not connected to 5V rail.
Board 4
- Rework 1 - verwijderen ESD diodes antenne
- Rework 2 - omdraaien transistors programmering
- 0-ohm (jumpering) R109 removed; 5V of USB not connected to 5V rail.
- Een van de program-transistors is vervangen door iets willekeurigs omdat de juiste wegsprong tijdens het solderen
Jumpers:
- Vint, 12 volt
- Vint to POE
- Vpoe - Off
- Vpoe5 - Slow Start
- Out1 - Direct (and wired to 12V/digital out)
- Out2 - joined N
- N cross connect of OPTO1
We are feeding the 3v3 via the 5 volt from the POE made by the 12 volt; this way the 3v3 stays cooler. As it does not have to do the 12->3.3 V in one step.
Special Wiring
The MOSFET 12 volt DC of OUT1 is wired to the C/NO of the relay output; so pin 14 & 15 of the big green connector carry the 12 volt and can be wired directly to the SSR and the cut-off Valve.
== Testing the electronics
A small 'TIG simulator' was build to test the electronics.


Connectors
Green Connector

| PIN | Description | Use |
|---|---|---|
| 1 | CUR2 | NC |
| 2 | CUR2 | NC |
| 3 | OPTO 4 | NC |
| 4 | OPTO 3 | NC |
| 5 | OPTO 2 | Voltage sense post on/off switch |
| 6 | OPTO 2 | N from TIG welder, post on/off switch |
| 7 | OPTO 1 | Torch/solenoid sense & output (from pin 14) |
| 8 | OPTO 1 | NC - solder jumper to N of power (Pin 10) |
| 9 | L input | L, connected, from plug |
| 10 | N input | N, connected, from plug |
| 11 | Relay 1 NO | 12 volt DC out to SSR & cutout valve |
| 12 | Relay 1 Common | 12 volt out to SSR & cutout valve |
| 13 | Relay 1 NC | NA |
| 14 | Relay 1 NC | To Torch/solenoid, wire to Torch/solenoid sense (pin 7) |
| 15 | Relay 1 common | NA; solder jumper to N of power (Pin 10) |
Valve Wire
| PIN | Description |
|---|---|
| Blue, black ferrule | 0 Volt |
| Black, Red ferrule | 12 Volt |
Sense Connector

| PIN | Inside Tig | Wire | Inside Node | to | Use |
|---|---|---|---|---|---|
| 1 | Black | Brown | Purple | N opto 2,3,4 | common |
| 2 | Blue | Red | Red | Opto1 & OUT2 | Solenoid sense/control; against feeding N |
| 3 | Green | Blue | Green | Opto 2 | Power sense; against common/1 |
Machine side is female - as to allow it to be disconnected with no dangerous voltages exposed.
Montageplaat ZP150.150.60J
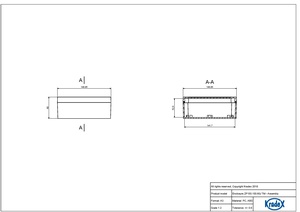
For a 150x150 TME enclosure; main dimensions
- 140x140
- Holes at 120; 10mm from left/right
- Holes at 125; 7.5mm from top/bottom
- Self tapping /parkers for plastic - hole is 3.2mm diameter; max length 6mm.
With a 3D printed spacer for some extra distance/shielding (https://www.thingiverse.com/thing:6782493).
Ontwerp overwegingen
Een alternative methode zou zijn geheel via een stroom meting te werken (een niveau voor passief aan, een niveau voor welding). En dan een extra bleed solenoid direct bij de AC node (en eventueel de check-valve weglaten). Voordeel hiervan is dat er niets in de TIG welder zelf verandert hoeft te worden - de aansluiting zou zelfs via een WCD kunnen.
Voor deze methode is niet gekozen - omdat onze stroom meting tot nu toe nogal last hebben van ruis; met name als er gelast wordt. Het is waarschijnlijk dat dit wel op te lossen is met een beter RC circuit.
Checklist node
Doel checken is
- Machine mag niet anders aan gaan dan met de schakelaar voorop
- Powercycle van de node moet geen rare situaties opleveren
- Spanningsonderbreking moet machine in veilige stand brengen.
- Timeout na X minuten moet de machine ook in veilige stand brengen.
- Machine mag nooit uit (of aan) gaan zonder gebruikers actie. Dus node/netwerk/etc verlies of een timeout mag niet leiden tot uitgaan of aangaan van de motor.
Stappen:
- Powercycle de node. Komt die terug op het netwerk ?
- Na powercycle; kan je de unit niet aan zetten ?
- Swipe, check dat de machine werkt. Zet hem uit. Onderbreek de stroom > 1 seconde en controleer dat de machine weer in de veilige stand staat.
Source code
https://github.com/MakerSpaceLeiden/AccessSystem/lib-arduino/ACNode/examples/TigWelderNode
Bill of material
| Back v1.11 node board | ~35 |
| ESP32 | ~3.50 |
| Big green Connector | ~1.50€ |
| RJ45 connector | ~0.10 |
| 220AC/DC 12V | ~2€ |
| Solenoid 12V | ~9€ |
| OLED display | ~3.50€ |
| Buttons x3 | ~0.30€ |
| Solid state relay, 40A | ~7.82€ |
| 12v coil relay; switch 240ACV/3A | free, donated to MSL |
| 150x150 enclosure with transparant lid | ~9.00€ |
| 3 pin sense cable connector | 3.10€ |
| Pressure sensor | 7.00€ |
| 4 wire pressure cable & socket | 0.50 € |
| 2 wire SSR cable & socket | 0.25 € |
| 4 long bolts | 0.80 € |
| Assorted ferrules | free, from space stock |
| Board with capacitor/resistor for hold-current suppression | free, donated to MSL |
De electra kabel is 2m; de slang ruim 1m50.
TODO
- Ferules/aderhulzen om netkabel in node (6x'dik')
- Faston/kabelschoentjes met extra doorlushaakje voor on-off sense
History
Build late 2024