Project Radar Boards Schiphol Control
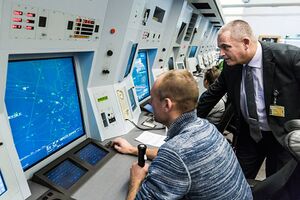
We got a [pile of Control Tower displays from Schiphol airport (or Eurocontrol, etc)] used for tracking what is in the air.
They are basically small 2-3 CPU boards on a common RS 485 bus or on RS 232. One CPU is purely for programming. The other is the main board and handles the traffic on the bus (it may be ASTERIX format?) and the other handles the display. They are interconnected by a TTL serial on 9600 8N1. Each box also contains a high quality PSU.
The programming chip is also 9600 8N1 and contains some debugging tooling. Photo below shows the testpoints used for programming.
But easiest may be to use normal ATMEL programmeing on MISO/MOSI - which are nicely broken out on the connector.
Inhoud
[verbergen]Code
Some fairly functional code: https://github.com/MakerSpaceLeiden/AirtrafficControlDisplaysSchiphol
Bestand:Schiphol-first-light.mov
grote (50229) display eerste test-tekst (youtube)
Schiphol Airtraffic Control displays
Om een van de hierboven ge-"transclude"d pagina's te wijzigen, bezoek de pagina via Categorie:DisplayBoardsSchiphol.
Datasheet displays
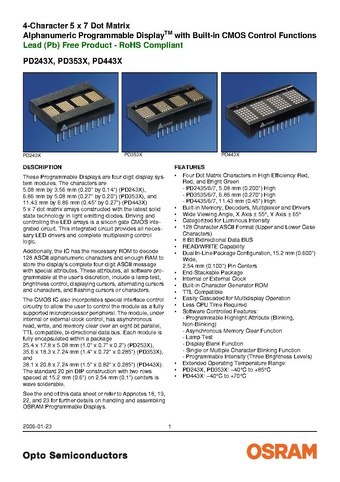
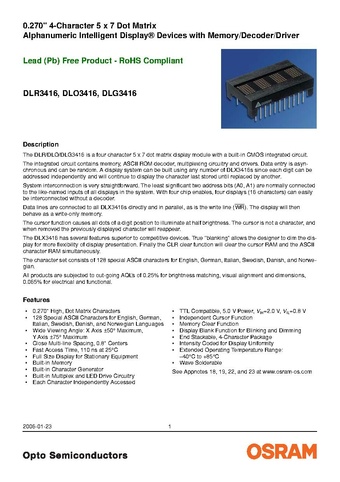
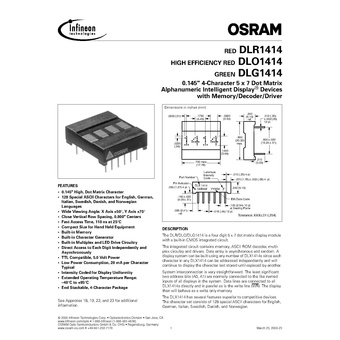
50228 and 50229 use PD44x (PD4435, red) displays. 50.028 and 50219 use DLO3416 (red). 50227 uses DLO1414 (smaller 4-digit display, red). 7003-assy uses PD2473 (green) (PD44x datasheet).
 PD44x
PD44x
Code in https://github.com/MakerSpaceLeiden/AirtrafficControlDisplaysSchiphol/blob/main/shared/pd44.c
Various people hack them
- https://www.flickr.com/photos/okini393939/5148872258
- https://github.com/TiNredmc/PD443X_Lib
- https://github.com/TiNredmc/PD443Xclock
Requirements for development
In general an AVR compiler, baseline libc and a programmer is needed.
You will need an AVR programmer. A simple one like [USBasp] should do. It has been tested against an [SK500].
For more complex interactive 'talking' to it (e.g. if you wanted to hook it up to FlightTracker, your clock or a calendar) - you will need a 5 volt tolerant [USB to TTL Serial] adaptor (or connect something like an Arduino or ESP32 to it. You may need a 3/5 volt [level] [converter] in that case).
You will also need 6 'dupont' cables -- they are [best] [bought] [in bulk].
Requirements Apple MacOSX
When using ports install:
sudo port instal avr-gcc avr-libc avrdude
Also install avr-binutils and avr-gdb if you want to do debugging.
Requirements Linux
In general something like
   sudo apt-get update
   sudo apt-get install avr-libc binutils-avr gcc-avr avrdude
should do.
Requirements Windows
The canonical tool is [AVR Studio] and the process is explained on [this page].
That said [PlatformIO with AVR] seems to be becoming the popular choice nowadays. See this [starter documentation].
      [env:the_latest_version]
      platform = atmelavr

      [env:ATmega161]
      platform = atmelavr
      board_build.mcu = atmega161
      board_build.f_cpu = 8000000

      [env:flash]
      platform = atmelavr
      # board = atmega161
      board_build.mcu = atmega161
      board_build.f_cpu = 8000000
      upload_protocol = custom
      upload_port = usb
      #         $(AVRDUDE) $(AVRDUDEFLAGS) $(AVRDUDECONF) -c avrispmkII -p m161 -U flash:w:$<:i
      upload_flags =
          -C
          $PROJECT_PACKAGES_DIR/tool-avrdude/avrdude.conf
          -p
      	m161
          -c
          	avrispmkII
      upload_command = avrdude $UPLOAD_FLAGS -U flash:w:$SOURCE:i


