Pipe Clamps: verschil tussen versies
k |
k |
||
| Regel 17: | Regel 17: | ||
It is recommended to add some clamps from the top to even out the pressure forces. If the joints between the pieces are not exactly 90deg, it is a good idea to to add some transversal pieces with clamps to keep the panel flat (it is generally a good idea). To prevent the transversal pieces to adhere to the panel, an effective trick is to cover with packing tape (does not stick to normal wood glue, this could be different with polyurethane glue). | It is recommended to add some clamps from the top to even out the pressure forces. If the joints between the pieces are not exactly 90deg, it is a good idea to to add some transversal pieces with clamps to keep the panel flat (it is generally a good idea). To prevent the transversal pieces to adhere to the panel, an effective trick is to cover with packing tape (does not stick to normal wood glue, this could be different with polyurethane glue). | ||
| − | Due to the way the pipes have a been manufactured, they have a black appearance that can leave some black spots on your panel. It is therefore advised to lay some tape on the pipes to prevent this | + | Due to the way the pipes have a been manufactured, they have a black appearance that can leave some black spots on your panel. It is therefore advised to lay some tape on the pipes to prevent this. |
Increase the clamping pressure evenly between all clamps and wait a bit before tightening some more. | Increase the clamping pressure evenly between all clamps and wait a bit before tightening some more. | ||
| Regel 26: | Regel 26: | ||
[[Bestand:Pipe clamps connectors.jpg|thumb|Pipe clamps connectors]] | [[Bestand:Pipe clamps connectors.jpg|thumb|Pipe clamps connectors]] | ||
| − | + | ==Cleaning== | |
| + | It can happene that some glue drips onto the clamps and dries. In that case, the best solution is to use a chisel (preferably not the nice sharpened ones) and scrape the glue. To protect the clamps, you can either lay a piece of tape on the clamp (such as painter's tape) or apply some paste wax. | ||
==Storage== | ==Storage== | ||
Together with the other clamps on the clamps rack. | Together with the other clamps on the clamps rack. | ||
Versie van 20 mrt 2023 om 14:19
This equipment is safety category 6: Other equipment with no limits.
This equipment is Noise Category 3: Can be used at all hours. No limits.
Purpose
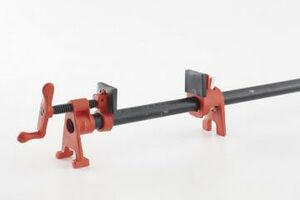
This type of clamps is particularly useful to glue up panels and/or very long pieces. The clamping capacity is about 100cm and can be extended to reach over 2m. We currently have 4 pipe clamps. See also the Sergant-klemmen with the pins (which have the business end much much nearer to the bar).
Panel glue-up
To glue up a panel, lay the clamps on a flat surface, and place the pieces of wood you want to glue. If you are not planning on retrimming the sides of your panel afterwards, it is a good idea to place sacrificial stripes of wood between the clamp heads and your wood pieces. This has a double advantage:
- Prevent the clamp heads from leaving dents in your wood
- Distribute the clamping pressure more evenly
It is recommended to add some clamps from the top to even out the pressure forces. If the joints between the pieces are not exactly 90deg, it is a good idea to to add some transversal pieces with clamps to keep the panel flat (it is generally a good idea). To prevent the transversal pieces to adhere to the panel, an effective trick is to cover with packing tape (does not stick to normal wood glue, this could be different with polyurethane glue).
Due to the way the pipes have a been manufactured, they have a black appearance that can leave some black spots on your panel. It is therefore advised to lay some tape on the pipes to prevent this.
Increase the clamping pressure evenly between all clamps and wait a bit before tightening some more.
If one clamp is blocked, you can gently use a pair of pliers (works better if you press on the underside).
Clamping long pieces
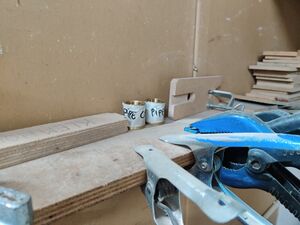
If you need to clamp something longer than 100 cm, you can combine two clamps together to reach around 2m of clamping capacity. This is done by removing one end of the clamp (make sure you keep the plastic cap that go on the threads) and joining two clamps using plumbing fittings (stored above the clamp storage shelf).
Cleaning
It can happene that some glue drips onto the clamps and dries. In that case, the best solution is to use a chisel (preferably not the nice sharpened ones) and scrape the glue. To protect the clamps, you can either lay a piece of tape on the clamp (such as painter's tape) or apply some paste wax.
Storage
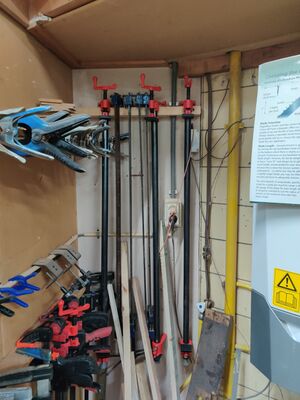
Together with the other clamps on the clamps rack.
Ownership & History
On loan from Valère since March 2023


