Collet Chuck: verschil tussen versies
(→How to use) |
|||
| (9 tussenliggende versies door 2 gebruikers niet weergegeven) | |||
| Regel 1: | Regel 1: | ||
| − | + | [[Category:Tools]][[Category:Metal working tools]][[Category:Metal lathe and mill tools]] | |
| + | {{SafetyCat4}}{{NoiseCat3}} | ||
=Intro= | =Intro= | ||
| + | [[Bestand:MT4ColletChuck.jpg|thumb]] | ||
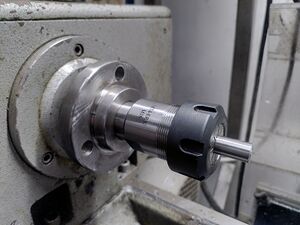
| + | We now have a collet chuck for the [[Metal Lathe / Metaal draaibank|Metal Lathe]] that works with [[ER_25/32/40_Collets_and_holders|ER32 collets]]. | ||
| + | A collet chuck allows you to maintain better concentricity when removing and remounting parts vs the 3 jaw chuck, without needing the hastle of dialing in a part with the 4 jaw chuck. It's not quite as perfect as with dialing in on a 4 jaw, but for many purposes it's good enough. | ||
| − | |||
| − | |||
| − | |||
| − | |||
| − | |||
| − | |||
| Regel 24: | Regel 22: | ||
[[Bestand:MT4ColletChuck04.jpg|800px]] | [[Bestand:MT4ColletChuck04.jpg|800px]] | ||
| − | In use the draw bar is threaded into the end of the ER32 holder, then fed through the spindle of the lathe (make sure to remove what ever chuck was fitted to the lathe first). The bushing is slid over the end of the draw bar and should register with the internal bore of the lathe spindle bore. Then the nut is threaded on the end to lock it all in place. | + | In use the draw bar is threaded into the end of the ER32 holder, then fed through the spindle of the lathe (make sure to remove what ever chuck was fitted to the lathe first). The bushing is slid over the end of the draw bar and should register with the internal bore of the lathe spindle bore. Then the nut is threaded on the end to lock it all in place. Note: the thread on the nut end of the draw bar is M12 x 1.5, and is not compatible with a normal M12 nut. Do not try to use normal M12 hardware, it will only end badly. |
Assembled it looks like this (obviously within, this photo is for demonstration purposes): | Assembled it looks like this (obviously within, this photo is for demonstration purposes): | ||
| Regel 33: | Regel 31: | ||
[[Bestand:MT4ColletChuck02.jpg|800px]] | [[Bestand:MT4ColletChuck02.jpg|800px]] | ||
| + | |||
| + | Installation of an ER32 collet is done the same way as with any other ER32 collet holder. There is a red handled C spanner for tightening the collet locking ring. | ||
| + | |||
| + | To remove the collet chuck from the lathe, undo the nut, then whole holding the collet chuck in one hand, tap the other end of the draw bar lightly with a hammer. This should cause the collet chuck to unseat and come out. Make sure you have your hand there to catch it so the whole assembly doesn't fly out and damage the ways of the lathe. | ||
| + | |||
| + | ==Todo== | ||
| + | |||
| + | * make a better nut | ||
| + | * make a spanner for the MT4 end | ||
| + | * make a wooden box | ||
| + | * Get a better selection of collets. | ||
==Other== | ==Other== | ||
The tool is on loan from Julia. | The tool is on loan from Julia. | ||
Huidige versie van 11 nov 2024 om 23:55
This equipment is safety category 4:
- In-person, instructions strongly advised but not mandatory.
- Reading, and following, the instructions on the Wiki is mandatory!
This equipment is Noise Category 3: Can be used at all hours. No limits.
Inhoud
[verbergen]Intro
We now have a collet chuck for the Metal Lathe that works with ER32 collets.
A collet chuck allows you to maintain better concentricity when removing and remounting parts vs the 3 jaw chuck, without needing the hastle of dialing in a part with the 4 jaw chuck. It's not quite as perfect as with dialing in on a 4 jaw, but for many purposes it's good enough.
How to use
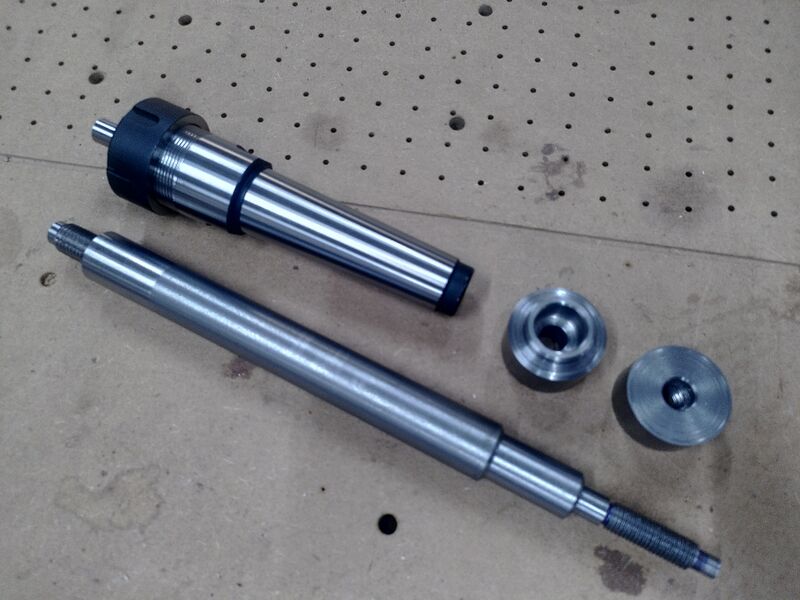
The collet chuck consists of four parts.
- MT4 ER32 collet holder
- Draw bar
- Bushing
- Nut
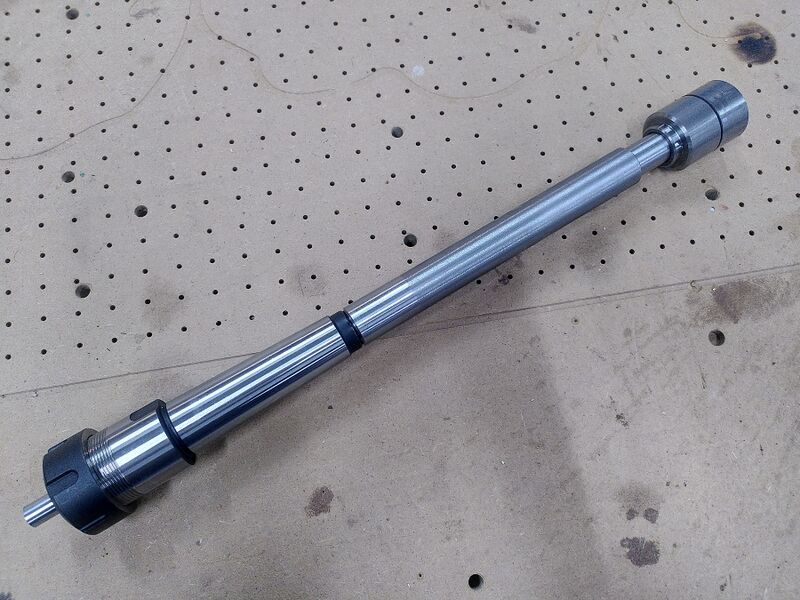
In use the draw bar is threaded into the end of the ER32 holder, then fed through the spindle of the lathe (make sure to remove what ever chuck was fitted to the lathe first). The bushing is slid over the end of the draw bar and should register with the internal bore of the lathe spindle bore. Then the nut is threaded on the end to lock it all in place. Note: the thread on the nut end of the draw bar is M12 x 1.5, and is not compatible with a normal M12 nut. Do not try to use normal M12 hardware, it will only end badly.
Assembled it looks like this (obviously within, this photo is for demonstration purposes):
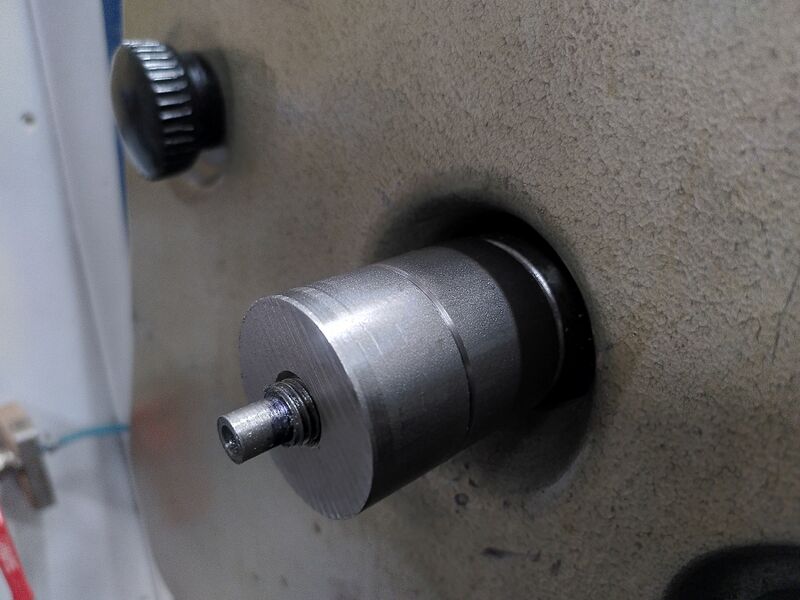
The read of the lathe should look something like this:
Installation of an ER32 collet is done the same way as with any other ER32 collet holder. There is a red handled C spanner for tightening the collet locking ring.
To remove the collet chuck from the lathe, undo the nut, then whole holding the collet chuck in one hand, tap the other end of the draw bar lightly with a hammer. This should cause the collet chuck to unseat and come out. Make sure you have your hand there to catch it so the whole assembly doesn't fly out and damage the ways of the lathe.
Todo
- make a better nut
- make a spanner for the MT4 end
- make a wooden box
- Get a better selection of collets.
Other
The tool is on loan from Julia.


