Payment Terminal with 4 seven segment displays: verschil tussen versies
(→Coffee node) |
|||
| (43 tussenliggende versies door 2 gebruikers niet weergegeven) | |||
| Regel 1: | Regel 1: | ||
| − | [[Categorie: | + | [[Categorie:Historic projects]][[Categorie:PaymentSystem]] |
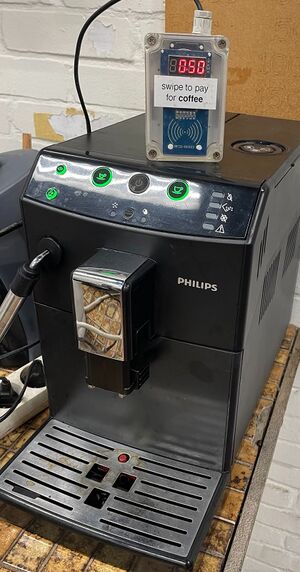
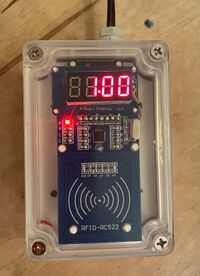
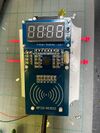
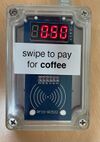
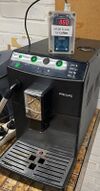
| − | + | [[Bestand:Payment-7seg-coffe.jpg|miniatuur|Paying for cofee]] | |
| + | [[Category:Nodes & network devices]] | ||
<div style="margin:12px; padding:12px; border:2px solid red; max-width:max-content"> | <div style="margin:12px; padding:12px; border:2px solid red; max-width:max-content"> | ||
experimental - security/privacy & reliability is not yet quite at the level required | experimental - security/privacy & reliability is not yet quite at the level required | ||
| Regel 6: | Regel 7: | ||
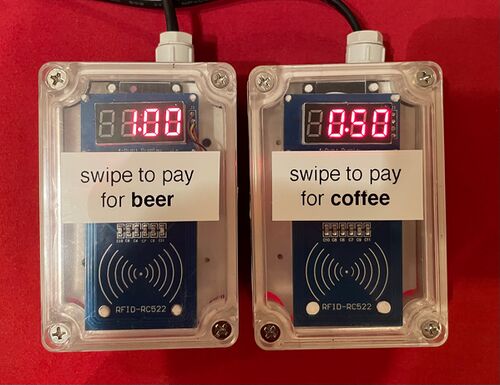
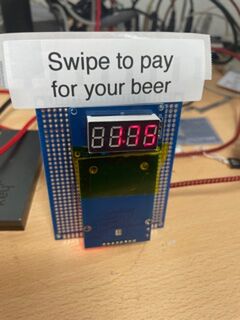
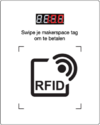
[[Bestand:Payment-7seg-samples.jpg|500px]] | [[Bestand:Payment-7seg-samples.jpg|500px]] | ||
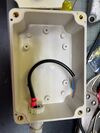
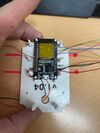
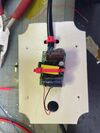
| + | [[Bestand:Spotheater-inside-3.jpg|200px|front - waiting to be connected]] | ||
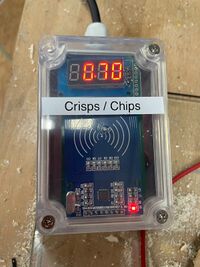
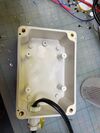
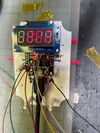
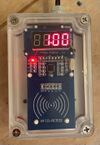
| + | [[Bestand:Payment-7seg-croky.jpg|200px|Crokypay]] | ||
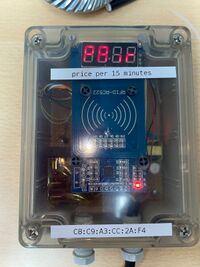
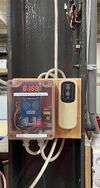
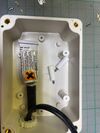
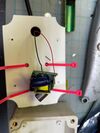
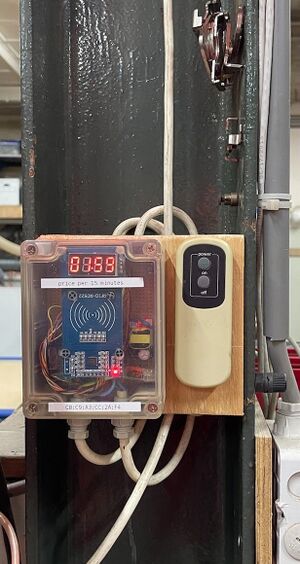
| + | [[Bestand:Spot heater control as mounted.jpg|100px]] | ||
Prototype voor bier/koffie afrekenen. Zie [[SpaceTegoed]] voor een overzicht/plan, [[Payment and Paring REST protocol]] for the protocol and [[https://github.com/dirkx/makerspaceleiden-payment-node github for code]]. | Prototype voor bier/koffie afrekenen. Zie [[SpaceTegoed]] voor een overzicht/plan, [[Payment and Paring REST protocol]] for the protocol and [[https://github.com/dirkx/makerspaceleiden-payment-node github for code]]. | ||
| Regel 19: | Regel 23: | ||
= Gebruikt instructie = | = Gebruikt instructie = | ||
| − | # Het 7 segment display toont het bedrag een euro's. ''(Dat blijft altijd hetzelfde (het komt elke nacht uit | + | # Het 7 segment display toont het bedrag een euro's. ''(Dat blijft altijd hetzelfde (het komt elke nacht uit [https://mijn.makerspaceleiden.nl mijn.makerspaceleiden.nl] - zie de prijslijst op https://mijn.makerspaceleiden.nl/pettycash/)''. |
# Swipe je tag langs de terminal. | # Swipe je tag langs de terminal. | ||
# Het display toont '[--]' en vervolgens 'PAID'. Je hebt nu betaald. Je krijgt een emailtje met de details van je betaling. Hier staat het bedrag in; de naam/locatie van de terminal en eventueel een beschrijving. En je zit dit in het overzicht op de website. | # Het display toont '[--]' en vervolgens 'PAID'. Je hebt nu betaald. Je krijgt een emailtje met de details van je betaling. Hier staat het bedrag in; de naam/locatie van de terminal en eventueel een beschrijving. En je zit dit in het overzicht op de website. | ||
| Regel 28: | Regel 32: | ||
Indien de betaling fout gaat zie je de text 'FAIL' en een cryptische 3 cijferige foutcode. | Indien de betaling fout gaat zie je de text 'FAIL' en een cryptische 3 cijferige foutcode. | ||
| − | Op de server wordt bijgehouden wat er fout ging. Als gebruiker kun je in dit geval niet veel meer doen dan via | + | Op de server wordt bijgehouden wat er fout ging. Als gebruiker kun je in dit geval niet veel meer doen dan via [https://mijn.makerspaceleiden.nl mijn.makerspaceleiden.nl] betalen, cash betalen, het bij de mailing lijst melden, of het later weer proberen. |
= Trouble shooting = | = Trouble shooting = | ||
| − | It is possible to 'telnet' | + | It is possible to 'telnet' into these units (on the normal telnet port #23) and see what normally would come out of the serial port. The units also sent their logging to syslog (to the spaceserver, 192.168.6.1). |
| − | Check the firewall, use a [[https://en.wikipedia.org/wiki/Multicast_DNS MDNS]] [[https://www.win.tue.nl/~johanl/educ/IoT-Course/mDNS-SD%20Tutorial.pdf resolver]] (or simply the Arduino IDE) to discover their IP address. You can do this from the RaspPi next to the [[ | + | Check the firewall, use a [[https://en.wikipedia.org/wiki/Multicast_DNS MDNS]] [[https://www.win.tue.nl/~johanl/educ/IoT-Course/mDNS-SD%20Tutorial.pdf resolver]] (or simply the Arduino IDE) to discover their IP address. You can do this from the RaspPi next to the [[Vinyl Cutter / Vinylsnijder / Snijplotter]]. |
{| class="wikitable" | {| class="wikitable" | ||
| Regel 40: | Regel 44: | ||
! MAC !! Versie !! Mac address !! IP address | ! MAC !! Versie !! Mac address !! IP address | ||
|- | |- | ||
| − | | Bier || 1.05 || 3C:71:BF:43:0F:E4 || 192.168.6.131 | + | | [[Node Bier]] || 1.05 || 3C:71:BF:43:0F:E4 || telnet://192.168.6.131/ |
| − | | Koffie || 1. | + | |- |
| + | | [[Node Koffie]] || 1.05 || 24:0A:C4:97:2B:74 || telnet://192.168.6.189/ | ||
| + | |- | ||
| + | | [[Node Chips]] || 1.08 || 3C:71:BF:D0:6A:08 || telnet://192.168.6.49/ | ||
| + | |- | ||
| + | | [[Node Spot Heating]] || n/a || n/a || n/a | ||
| + | |- | ||
|} | |} | ||
| − | A typical session looks like: | + | |
| + | The [[Node Spot Heating]] is a special version of this payment node. | ||
| + | |||
| + | Version deployed as of November 2021: https://github.com/dirkx/makerspaceleiden-payment-node-7segments/releases/tag/v1.05 -- with no PCB | ||
| + | |||
| + | Version deployed as of Januari 2024: https://github.com/dirkx/makerspaceleiden-payment-node-7segments/releases/tag/v1.07 -- against the green PCB | ||
| + | |||
| + | === telnet === | ||
| + | All of above can be reached by 'telnet'. A typical session looks like: | ||
<pre> | <pre> | ||
$ telnet 10.13.0.241 23 | $ telnet 10.13.0.241 23 | ||
| Regel 50: | Regel 68: | ||
Good scan | Good scan | ||
Payment completed successfully. | Payment completed successfully. | ||
| + | Wed Nov 3 19:02:11 Heap: 181 Kb | ||
</pre> | </pre> | ||
Any error message (post joining the Wifi network) will show up here. If the issue is prior to joining WiFi - you will have to connect a USB cable (Baudrate 115200, 8N1). The Raspi has the right drivers installed. | Any error message (post joining the Wifi network) will show up here. If the issue is prior to joining WiFi - you will have to connect a USB cable (Baudrate 115200, 8N1). The Raspi has the right drivers installed. | ||
| + | |||
| + | Furthermore - if you connect to <code>space.makerspaceleiden.nl</code> via [[MQTT]] - then you can also see the output: | ||
| + | |||
| + | <pre> | ||
| + | TOPIC: ac/log/tft-1.04-cbb67c | ||
| + | Grijpvoorraad { | ||
| + | "rfid_scans": 0, | ||
| + | "rfid_misses": 0, | ||
| + | "ota": true, | ||
| + | "state": 3, | ||
| + | "IP_address": "192.168.6.200", | ||
| + | "Mac_address": "C8:C9:A3:CB:B6:7C", | ||
| + | "Paid": 0, | ||
| + | "Version": "1.04", | ||
| + | "Firmware": "tft-1.04-cbb67c", | ||
| + | "heap": 139667 | ||
| + | } | ||
| + | </pre> | ||
= Display messages = | = Display messages = | ||
| Regel 82: | Regel 119: | ||
## <code>DONE</code> - successful end of OTA. Unit will reboot. | ## <code>DONE</code> - successful end of OTA. Unit will reboot. | ||
## <code>any error message</code> - scrolling error message & after which the device will switch back to the old/current firmware | ## <code>any error message</code> - scrolling error message & after which the device will switch back to the old/current firmware | ||
| + | ### <code>FO:AF</code> - OTA authentication failed | ||
| + | ### <code>FO:BF</code> - OTA begin failed | ||
| + | ### <code>FO:CF</code> - OTA connect failed | ||
| + | ### <code>FO:RF</code> - OTA receive failed | ||
| + | ### <code>FO:EF</code> - OTA end failed | ||
| + | ### <code>FO:OF</code> - OTA 'other' failure | ||
# During initial pairing / post an OTA | # During initial pairing / post an OTA | ||
## <code>REG</code> Registering with the server | ## <code>REG</code> Registering with the server | ||
## <code>PAIR</code> requesting to pair; swipe an admin tag. | ## <code>PAIR</code> requesting to pair; swipe an admin tag. | ||
| + | ## <code>Er:NA</code> Fault Name - unit was paired but does not yet have a name/pricelist assigned (v1.08 and higher) | ||
## <code>any error message</code> - scrolling error message. | ## <code>any error message</code> - scrolling error message. | ||
= 3D printed prototype = | = 3D printed prototype = | ||
| + | |||
| + | '''Note: er zijn inmiddels kant en klaar printjes voor een volgende - vraag dirkx.''' | ||
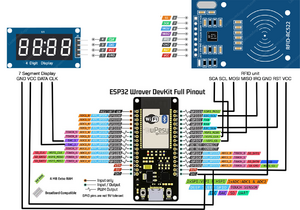
[[Bestand:Betaalterminal-prototype-7segp-wring.png|300px|wiring]] | [[Bestand:Betaalterminal-prototype-7segp-wring.png|300px|wiring]] | ||
| Regel 95: | Regel 141: | ||
Code is at https://github.com/MakerspaceLeiden/makerspaceleiden-payment-node-7segments. | Code is at https://github.com/MakerspaceLeiden/makerspaceleiden-payment-node-7segments. | ||
| − | Het 3D printje ([[https://github.com/MakerSpaceLeiden/makerspaceleiden-payment-node-7segments/blob/main/enclosure.scad OpenSCAD en STL file]]) in het code repository) is voor een stel afstandhouders & montage plaat die passen in een G21 doosje met transparant deksel. Zodat de RFID reader flush genoeg is om makkelijk pasjes te kunnen lezen. | + | Het 3D printje ([[https://github.com/MakerSpaceLeiden/makerspaceleiden-payment-node-7segments/blob/main/enclosure.scad OpenSCAD en STL file]]) in het code repository) is voor een stel afstandhouders & montage plaat die passen in een G21 doosje met transparant deksel. Zodat de RFID reader flush genoeg is om makkelijk pasjes te kunnen lezen. Er liggen nog G21 doosjes onder in de groene kast. |
| − | Er zit een kleine AC/5V DC schakelende voeding onder de montage plaat. Hiermee is alle 220 volt weggebouwd onder de montage plaat - die je 'extra' moet losschroeven na loshalen deksel. | + | Er zit een kleine AC/5V DC schakelende voeding onder de montage plaat. Hiermee is alle 220 volt weggebouwd onder de montage plaat - die je 'extra' moet losschroeven na loshalen deksel. Er liggen nog wat van die voedingen in de E-laatjes. |
[[Bestand:Betaalterminal-prototype-7seg-img1-v100.jpg|200px|v1.03 prototype]] | [[Bestand:Betaalterminal-prototype-7seg-img1-v100.jpg|200px|v1.03 prototype]] | ||
| Regel 131: | Regel 177: | ||
# Haal een git/zip versie op van https://github.com/MakerSpaceLeiden/makerspaceleiden-payment-node-7segments/ | # Haal een git/zip versie op van https://github.com/MakerSpaceLeiden/makerspaceleiden-payment-node-7segments/ | ||
# Zet de #defines met de netwerk namen goed. Kies een unique terminal naam. | # Zet de #defines met de netwerk namen goed. Kies een unique terminal naam. | ||
| − | # Overleg met noc@ voor een 'bearer token' voor toegang als je de productie versie maakt. | + | # <strike>Overleg met noc@ voor een 'bearer token' voor toegang als je de productie versie maakt.</strike> |
# Idem voor het OTA wachtwoord. | # Idem voor het OTA wachtwoord. | ||
# Compiler & flash via serial (daarna kan het via OTA). | # Compiler & flash via serial (daarna kan het via OTA). | ||
| Regel 137: | Regel 183: | ||
= Bouw instructie = | = Bouw instructie = | ||
| + | |||
| + | If any more need to be build - contact Dirk-Willem; as he has 5 pre-made circuitboards with all/most of the wiring already made. | ||
[[Bestand:Payment-7seg-bouw-4.jpg|100px]] | [[Bestand:Payment-7seg-bouw-4.jpg|100px]] | ||
| Regel 163: | Regel 211: | ||
* Soldeer daar ook alle draden aan. | * Soldeer daar ook alle draden aan. | ||
* Test alles, haal usb kabel los en sluit het doosje. | * Test alles, haal usb kabel los en sluit het doosje. | ||
| + | |||
| + | == Activatie == | ||
| + | |||
| + | Zie [[SpaceTegoed#Het_koppelen_van_betaalterminals_aan_het_betaalsysteem]] voor de activatie procedure. Overleg even met het bestuur om je pas ge-accordeert te krijgen voor test/initiatie & test betalingen. | ||
| + | |||
| + | == Wiring 7 segments display == | ||
| + | |||
| + | {| class="wikitable" | ||
| + | |- | ||
| + | ! Functie !! ESP32 !! Board | ||
| + | |- | ||
| + | | DATA || GPIO 25 || 4 | ||
| + | |- | ||
| + | | CLK || GPIO 26 || 3 | ||
| + | |- | ||
| + | | VCC 7 segments display || 3V3 || 2 | ||
| + | |- | ||
| + | | GND 7 segments display || GND || 1 | ||
| + | |} | ||
| + | |||
| + | == Wiring RFID RC522 card == | ||
| + | |||
| + | {| class="wikitable" | ||
| + | |- | ||
| + | | SCA/SS RFID || GPIO 5 || 8 | ||
| + | |- | ||
| + | | SCL RFID || GPIO 18 || 7 | ||
| + | |- | ||
| + | | MOSI RFID || GPIO 23 || 6 | ||
| + | |- | ||
| + | | MISO RFID || GPIO 19 || 5 | ||
| + | |- | ||
| + | | IRQ || GPIO 22 || 4 | ||
| + | |- | ||
| + | | GND || GND || 3 | ||
| + | |- | ||
| + | | RST || GPIO 21 || 2 | ||
| + | |- | ||
| + | | VCC || 3V3 || 1 | ||
| + | |} | ||
= Versions build = | = Versions build = | ||
| Regel 180: | Regel 268: | ||
[[Bestand:Payment-7seg-bouw-10.jpg|100px]] | [[Bestand:Payment-7seg-bouw-10.jpg|100px]] | ||
| + | [[Bestand:Payment-7seg-coffe.jpg|100px]] | ||
* Wifi-Mac address ends with <code>972b75</code> | * Wifi-Mac address ends with <code>972b75</code> | ||
| Regel 187: | Regel 276: | ||
* Rode ledje is gedesoldeerd (want zwart maken lukte niet erg) | * Rode ledje is gedesoldeerd (want zwart maken lukte niet erg) | ||
| − | Current software: https://github.com/dirkx/makerspaceleiden-payment-node-7segments/releases/tag/v1. | + | Current software: https://github.com/dirkx/makerspaceleiden-payment-node-7segments/releases/tag/v1.05 |
| + | |||
| + | == Crisp Node == | ||
| + | |||
| + | [[Bestand:Payment-7seg-croky.jpg|200px|Crokypay]] | ||
| + | |||
| + | * Wifi-Mac address: 3C:71:BF:D0:6A:08 | ||
| + | * Software version 1.08 | ||
| + | * Uses Green PCB that has been butchered a fair bit. | ||
| + | * Normal 220v AC/DC 5 volt power supply (0.2 Watt) | ||
| + | * Top dot of the 7-segment display has been painted black | ||
| + | * TODO: Boards are floating a bit - would benefit from some TLC or a rebuild | ||
| + | |||
| + | == Heating Node == | ||
| + | [[Bestand:Spot heater control as mounted.jpg|miniatuur]] | ||
| + | |||
| + | See [[Node Spot Heating|this page on paying for heating in the metal work area]] for details. | ||
Huidige versie van 17 nov 2024 om 00:38
experimental - security/privacy & reliability is not yet quite at the level required
Prototype voor bier/koffie afrekenen. Zie SpaceTegoed voor een overzicht/plan, Payment and Paring REST protocol for the protocol and [github for code].
Inhoud
[verbergen]Wat doet het
Bij dit type betaal terminal kan je maar voor één ding, met een vaste prijs, betalen.
Gebruikt instructie
- Het 7 segment display toont het bedrag een euro's. (Dat blijft altijd hetzelfde (het komt elke nacht uit mijn.makerspaceleiden.nl - zie de prijslijst op https://mijn.makerspaceleiden.nl/pettycash/).
- Swipe je tag langs de terminal.
- Het display toont '[--]' en vervolgens 'PAID'. Je hebt nu betaald. Je krijgt een emailtje met de details van je betaling. Hier staat het bedrag in; de naam/locatie van de terminal en eventueel een beschrijving. En je zit dit in het overzicht op de website.
- Daarna gaat het weer terug naar stap 1.
Een filmpje van een prototype: https://vimeo.com/manage/videos/625531264
Indien de betaling fout gaat zie je de text 'FAIL' en een cryptische 3 cijferige foutcode.
Op de server wordt bijgehouden wat er fout ging. Als gebruiker kun je in dit geval niet veel meer doen dan via mijn.makerspaceleiden.nl betalen, cash betalen, het bij de mailing lijst melden, of het later weer proberen.
Trouble shooting
It is possible to 'telnet' into these units (on the normal telnet port #23) and see what normally would come out of the serial port. The units also sent their logging to syslog (to the spaceserver, 192.168.6.1).
Check the firewall, use a [MDNS] [resolver] (or simply the Arduino IDE) to discover their IP address. You can do this from the RaspPi next to the Vinyl Cutter / Vinylsnijder / Snijplotter.
| MAC | Versie | Mac address | IP address |
|---|---|---|---|
| Node Bier | 1.05 | 3C:71:BF:43:0F:E4 | telnet://192.168.6.131/ |
| Node Koffie | 1.05 | 24:0A:C4:97:2B:74 | telnet://192.168.6.189/ |
| Node Chips | 1.08 | 3C:71:BF:D0:6A:08 | telnet://192.168.6.49/ |
| Node Spot Heating | n/a | n/a | n/a |
The Node Spot Heating is a special version of this payment node.
Version deployed as of November 2021: https://github.com/dirkx/makerspaceleiden-payment-node-7segments/releases/tag/v1.05 -- with no PCB
Version deployed as of Januari 2024: https://github.com/dirkx/makerspaceleiden-payment-node-7segments/releases/tag/v1.07 -- against the green PCB
telnet
All of above can be reached by 'telnet'. A typical session looks like:
$ telnet 10.13.0.241 23
4x7-F1-05-430fe4 Serial connected 3C:71:BF:43:0F:E4
Good scan
Payment completed successfully.
Wed Nov  3 19:02:11 Heap: 181 Kb
Any error message (post joining the Wifi network) will show up here. If the issue is prior to joining WiFi - you will have to connect a USB cable (Baudrate 115200, 8N1). The Raspi has the right drivers installed.
Furthermore - if you connect to space.makerspaceleiden.nl via MQTT - then you can also see the output:
TOPIC: ac/log/tft-1.04-cbb67c
   Grijpvoorraad {
  "rfid_scans": 0,
  "rfid_misses": 0,
  "ota": true,
  "state": 3,
  "IP_address": "192.168.6.200",
  "Mac_address": "C8:C9:A3:CB:B6:7C",
  "Paid": 0,
  "Version": "1.04",
  "Firmware": "tft-1.04-cbb67c",
  "heap": 139667
}
Display messages
- During startup
F X-YY- version number firmware during booting.CONN- connecting to WiFiNTP- getting the timeF CA- Fetching the Certificate AuthorityF PL- Fetching the price listFAIL- failed to connect to WiFi; will reboot.any error message- scrolling error message & after which either reboot or hang if it unrecoverable.
- At the end of startup (from this point onwards OTA is possible).
----- fully started up; but have not yet gotten the pricelistno prices- price list could not be fetched. Will retry for a few minutes every 15 seconds; then reboot.
- In normal payment mode
X.YY- price to pay when you swipe[--]- in the process of payingpaid- you have paidFAIL- payment failedany error message- scrolling error message.FAIL -1- netwerk/wifi error. Powercyle de unit.FAIL -4- netwerk/wifi error. Powercyle de unit.FAIL 40XGebruik je een geldige tag ?FAIL 500Error op de server; mail noc@.
- During Over the Air reprogramming.
PROG- start of OTA updateF XX- OTA; uploading new firmware; XX is the percentage fetchedDONE- successful end of OTA. Unit will reboot.any error message- scrolling error message & after which the device will switch back to the old/current firmwareFO:AF- OTA authentication failedFO:BF- OTA begin failedFO:CF- OTA connect failedFO:RF- OTA receive failedFO:EF- OTA end failedFO:OF- OTA 'other' failure
- During initial pairing / post an OTA
REGRegistering with the serverPAIRrequesting to pair; swipe an admin tag.Er:NAFault Name - unit was paired but does not yet have a name/pricelist assigned (v1.08 and higher)any error message- scrolling error message.
3D printed prototype
Note: er zijn inmiddels kant en klaar printjes voor een volgende - vraag dirkx.
Code is at https://github.com/MakerspaceLeiden/makerspaceleiden-payment-node-7segments.
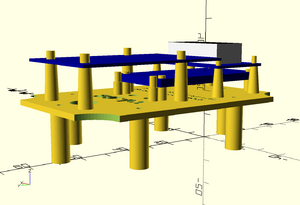
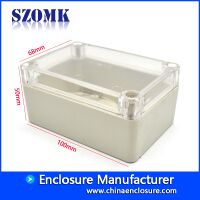
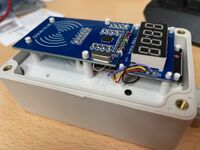
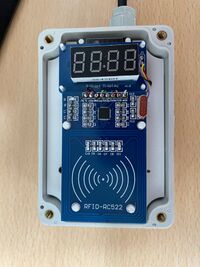
Het 3D printje ([OpenSCAD en STL file]) in het code repository) is voor een stel afstandhouders & montage plaat die passen in een G21 doosje met transparant deksel. Zodat de RFID reader flush genoeg is om makkelijk pasjes te kunnen lezen. Er liggen nog G21 doosjes onder in de groene kast.
Er zit een kleine AC/5V DC schakelende voeding onder de montage plaat. Hiermee is alle 220 volt weggebouwd onder de montage plaat - die je 'extra' moet losschroeven na loshalen deksel. Er liggen nog wat van die voedingen in de E-laatjes.
Caveat prototype - de standoffs zijn 2mm korter gemaakt om net wat meer ruimte te krijgen bij het display. Dit is gecorrigeerd in version 1.03 in van de STL/openScad file in git.
Bill of materials
Materialen; duurste onderdelen eerst:
- ESP32: 7 euro - https://www.amazon.nl/AZDelivery-Development-opvolger-compatibel-Inclusief/dp/B074RG86SR/ref=sr_1_9
- PVC Doosje: 4 euro - [[aliexpress or Amazon [1], [2] or [3].
- 7 segment display: 2.50 euro - https://www.amazon.nl/Youmile-Display-Gemeenschappelijke-Digitale-Man-vrouw/dp/B082193P1V/ref=sr_1_33
- 1 RFID reader; ~2.50 Euro; (https://www.amazon.nl/gp/product/B074S9FZC5)
- AC/5V transformer: 1.00 euro - https://www.aliexpress.com/item/33012749903.html
- 1 doorvoerwartel; 12mm: 0.35 euro (voorraad space, https://www.aliexpress.com/item/32866592761.html)
- netsnoer - weggooikast space
- draadjes - electronica hoek
- PLA (hoeft beslist geen PLA te zijn) - ~ 14 gram / krap 2 meter (voorraad space) om [[1]] uit te printen.
- 4 spijkertjes & willekeurige (super)glue voor PVC/PLA -- om de standoffs onder de montage plaat wat extra steun te geven middels de gaatjes in het kastje (voorraad space)
- drie tie-wraps (voorraad space)
Totaal: < 20 euro; 4 uur printen; 30 minuten solderen/assemblage.
Compileren software
- Installeer een recente versie van [[2]].
- Installeer een stable versie van de SDK voor de ESP32 volgens https://docs.espressif.com/projects/arduino-esp32/en/latest/installing.html
- Selecteer in tools het platform ESP32 en dan het board dat je gebruikt (WRover, Devkit)
- Installeer via de 'Library' optie de bibliotheken MFRC522-spi-i2c-uart-async, TM1637TinyDisplay en Arduino_JSON
- Haal een git/zip versie op van https://github.com/MakerSpaceLeiden/makerspaceleiden-payment-node-7segments/
- Zet de #defines met de netwerk namen goed. Kies een unique terminal naam.
Overleg met noc@ voor een 'bearer token' voor toegang als je de productie versie maakt.- Idem voor het OTA wachtwoord.
- Compiler & flash via serial (daarna kan het via OTA).
- Nota bene: with the cheaper boards; it may be needed to press 'BOOT' during the start of the programming.
Bouw instructie
If any more need to be build - contact Dirk-Willem; as he has 5 pre-made circuitboards with all/most of the wiring already made.
- Print https://github.com/MakerSpaceLeiden/makerspaceleiden-payment-node-7segments/blob/main/enclosure.stl
- Boor gat en monteer wartel in het kastje. Doe dit zo laag mogelijk.
- Stop 4 spijkertjes in de standoffs; laat ze 2mm uitsteken, zodat flush zitten in de gaatjes in de standoff van het kaste. Lijm ze alle 4 vast aan het kastje. Zodat je straks de montage plaat er op kan leggen.
- Soldeer alle wat te langen draden volgens https://github.com/MakerSpaceLeiden/makerspaceleiden-payment-node-7segments/blob/main/wiring-rover.png aan de ESP32 print.
- Monteer de ESP32 print op de montage plaat. Steek de VIN/GND draad door het ronde gat naar onder. Voor het grote type moet je de twee standoffs die in de weg zitten wegknippen. Voor de korte print hoeft dat niet.
- Programeer de ESP32 met https://github.com/MakerSpaceLeiden/makerspaceleiden-payment-node-7segments/blob/main/makerspaceleiden-payment-node-7seg.ino; laat te USB kabel er voorlopig in zitten.
- Monteer de RFID print en soldeer haar draden vast.
- Monteer de 7-seg print en soldeer die draden ook. Als de ESP32 haar kapje dicht bij de vrij lange pinnen van de 7-seg print komt - plak dan wat capton tape over het blikken kapje.
- Monteer de voeding met een tie-wrap onderop.
- Zorg voor goede trekontlasting netkabel en soldeer deze ook aan de voeding
- Leg de montage print op de standoffs - en doe er 4 pakkertjes door.
- Maak het bovenste puntje van de
:zwart zodat het lijkt op een.. - Maak het rode ledje van de RFID zwart.
- OPTIE: smelt de eindjes die door de printjes heen zitten.
- Soldeer daar ook alle draden aan.
- Test alles, haal usb kabel los en sluit het doosje.
Activatie
Zie SpaceTegoed#Het_koppelen_van_betaalterminals_aan_het_betaalsysteem voor de activatie procedure. Overleg even met het bestuur om je pas ge-accordeert te krijgen voor test/initiatie & test betalingen.
Wiring 7 segments display
| Functie | ESP32 | Board |
|---|---|---|
| DATA | GPIO 25 | 4 |
| CLK | GPIO 26 | 3 |
| VCC 7 segments display | 3V3 | 2 |
| GND 7 segments display | GND | 1 |
Wiring RFID RC522 card
| SCA/SS RFID | GPIO 5 | 8 |
| SCL RFID | GPIO 18 | 7 |
| MOSI RFID | GPIO 23 | 6 |
| MISO RFID | GPIO 19 | 5 |
| IRQ | GPIO 22 | 4 |
| GND | GND | 3 |
| RST | GPIO 21 | 2 |
| VCC | 3V3 | 1 |
Versions build
Beer node
- Wifi-Mac address ends with
430FE4 - Has Uses pin 15 rather than 15 and RST/IRQ is swapped
- Versie 1.02 van de mount plate.
- Standoffs niet platgespoten
Current software: https://github.com/dirkx/makerspaceleiden-payment-node-7segments/releases/tag/v1.05
Coffee node
- Wifi-Mac address ends with
972b75 - Correct wiring.
- Hole for the gland slightly too high.
- Versie 1.04 van de mount plate.
- Rode ledje is gedesoldeerd (want zwart maken lukte niet erg)
Current software: https://github.com/dirkx/makerspaceleiden-payment-node-7segments/releases/tag/v1.05
Crisp Node
- Wifi-Mac address: 3C:71:BF:D0:6A:08
- Software version 1.08
- Uses Green PCB that has been butchered a fair bit.
- Normal 220v AC/DC 5 volt power supply (0.2 Watt)
- Top dot of the 7-segment display has been painted black
- TODO: Boards are floating a bit - would benefit from some TLC or a rebuild
Heating Node
See this page on paying for heating in the metal work area for details.
