Pedestal grinder / Slijpmachine kolom: verschil tussen versies
(→Safety Relay wiring) |
|||
| Regel 1: | Regel 1: | ||
[[Category:Wood]][[Category:Metal]][[Category:Tool]] | [[Category:Wood]][[Category:Metal]][[Category:Tool]] | ||
| + | [[Categorie:Tools]][[Categorie:Metal working tools]][[Categorie:Wood working tools]] | ||
{{SafetyCat2}} | {{SafetyCat2}} | ||
{{NoiseCat2}} | {{NoiseCat2}} | ||
Versie van 8 jul 2024 om 12:30
This equipment is safety category 2:
- Mandatory instructions.
- [liability waiver] on file.
- Approval from trustees, but ok to operate alone
- (but be careful/ensure you have assistance when handling very large things).
This equipment is Noise Category 2:
Can be used at all hours, but in moderation.
Be considerate; if you feel you need to wear ear protection,
then only use the tool between 07:00 and 19:00.
Inhoud
Grote Staande Slijpert
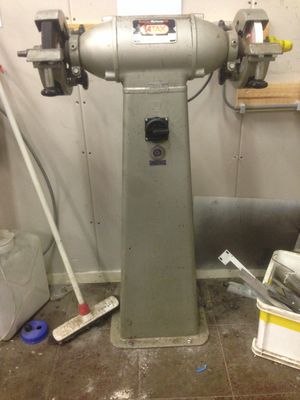
The large grinder is located in the metal workshop. It is often used to sharpen tools; including those from the wood workshop. It runs on 3 phase power (and thus is rather powerful - it won't stop if you put your finger in it).
Er zit meestal een 70-80 grit (Links, grijs) en een 120 grit (wit, rechts) in de machine.
Safety
The machine requires mandatory instructions, [liability waiver] on file and approval from the trustees.
The main safety issues are getting grabbed by the wheel (it is a powerful 3-fase machine) and sparks/flying bits.
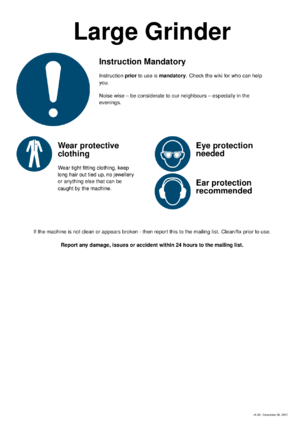
Wear protective eyewear, make sure you wear appropriate tight fitting clothes, no rings, jewellery and keep things like long hair well out of harms way. Be also careful with synthetic clothing or anything that can burn (or melt into your skin) -- the use of cotton/fire-safe fabrics is strongly advised. There is a gray cotton coat in the workshop (near the CV).
Be also very careful with gloves; either ensure they are very very strong (such a as the tick leather gloves used for welding) or so weak that they will tear well before your fingers or hand is pulled into the grindstone.
It is OK to operate the machine alone.
With respect to noise - be kind and considerate after 19:00 - and limit yourself to sporadic low-noise use. Use ear-protection when appropriate.
Other points of note:
- Check the wheel for cracks - if any appear - stop using it.
- Make sure the rests are close to the wheels (about 2-3mm).
- Do not adjust the rests while the machine is spinning.
- Use a dusk mask/protection when appropriate.
Operating the machine
The machine has a safety relay. This stops the machines from starting unattended.
To power on the machine:
- Ensure that the round on-off switch on machine (middle of the pedestal) is in the off position.
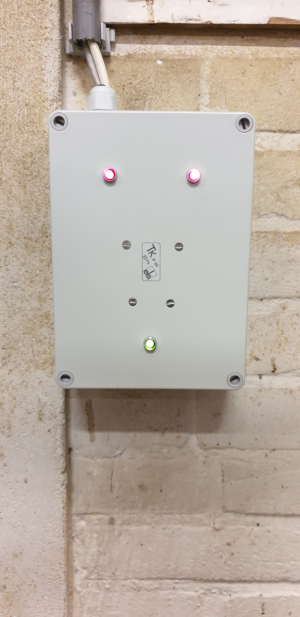
- Identify yourself by holding your ID card (tag) against the front side of the NodeMetal box, which is placed on the wall below the wall control box.
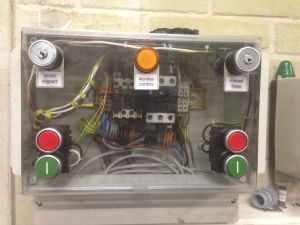
- Press the green 'on' button on the wall control box (to the right of the grinder; just past the desk with the drill press)
- Use the round on-off switch on machine (middle of the pedestal) during use.
To power off the machine:
- Ensure that the round on-off switch on machine (middle of the pedestal) is in the off position.
- Press the red 'off' button on the wall control box (to the right of the grinder; just past the desk with the drill press)
To put the machine into `out of order' mode.
- Ensure that the round on-off switch on machine (middle of the pedestal) is in the off position.
- Press the red 'off' button on the wall control box (to the right of the grinder; just past the desk with the drill press)
- Take the key which is inside the control box and use that to operate the keylock of the grinder; setting it it '0'.
- If you are very concerned about someone re-enabling it - then hand the key to one of the trustees or put it in the mailbox of a trusteed (the one where you sent the [liability waiver] to).
- Report the issue to the mailing list.
Aluminium
There are currently no rules around what materials can be ground.
Ritsen / Dressing of the wheel
There is a Diamond dresser / Ritser for the grinder - this allows us to keep the surface nice and smooth. Alex has made a nice holder for it which makes use relatively easy and hold it at the required 15 degree angle (relative to the line perpendicular on the roundness of the disk).
Ask on the mailing list for someone to show you how that is done.
Nieuwe slijpstenen
De axis diameter is 25mm; the typical plastic inset that come with the disks bring that to a tad below 32mm; and the outer diameter should be 200mm or less (usually 150mm @ HBM).
Safety Relay wiring
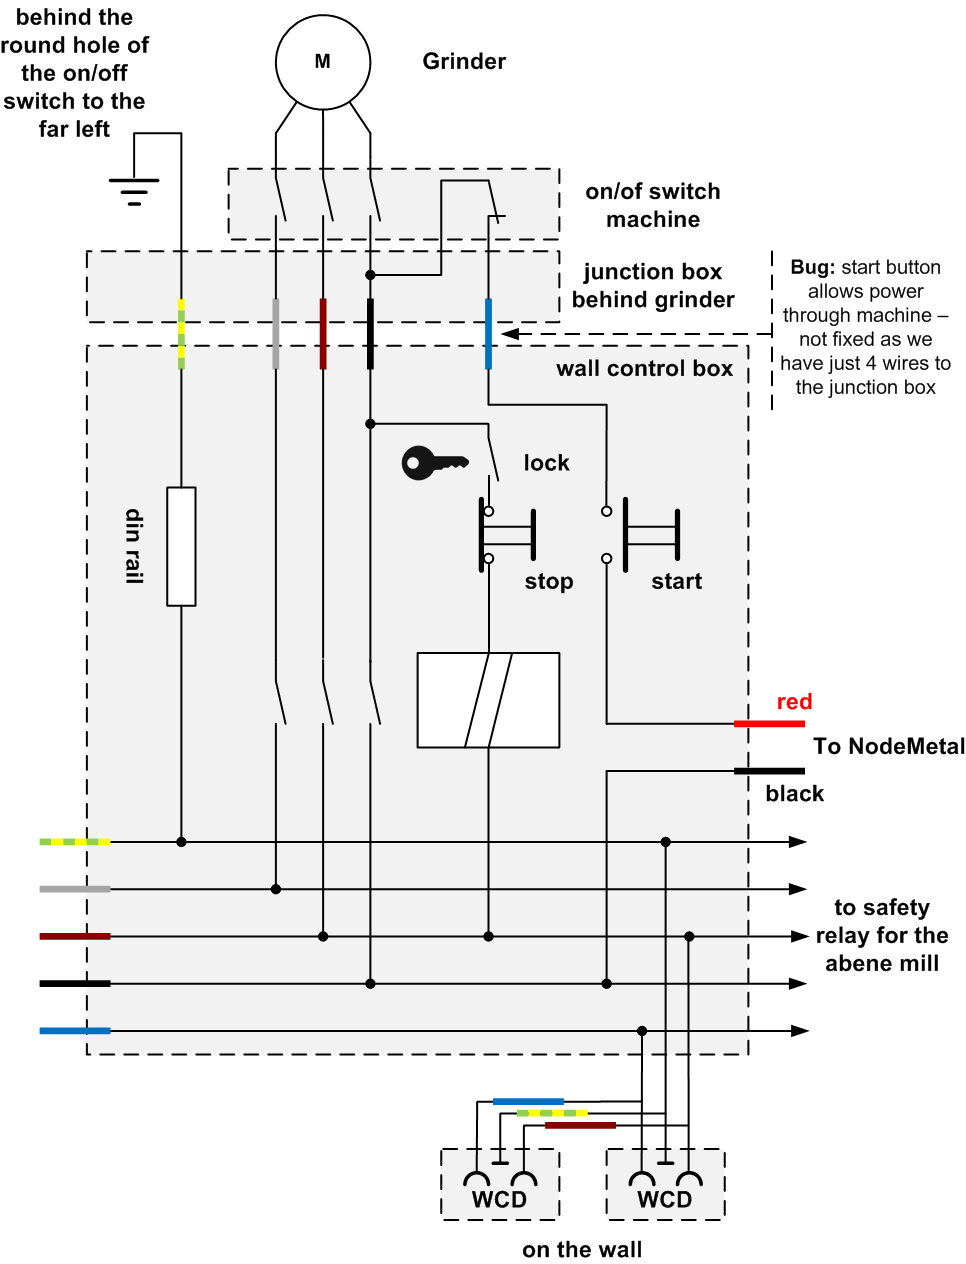
The SafetyRelay is currently a standard safety relay setup with a small twist; rather than use the spare NO (or an NC) on the relay - we abuse the 'free' blue wire in the existing cable in conjunction with the NC of the grinder switch. This lets us prevent powering up the relay when the on/off switch is in the wrong position. But it does mean that we allow power to one of the phases of the grinder while pressing the button. That is not ideal.
Other issues of note:
- the grounding is through the DIN rail.
- There are some junctions in N and L1 hiding in the bottom part of the unit.
- Some of the one step short jumpers are recycled multi-steps; so there is some exposed copper where there should not be any.
- We've had issues with the reliability of the NC push buttons.
May 2022
De tijdelijke verlengkabel is weggehaald - en er is een extra draad getrokken voor de draaibank.
In dit process zijn de draden verwisseld geraakt.
In onderstaande diagram is de bruin de zwart, de zwart de grijs, en grijs de bruin geworden.
