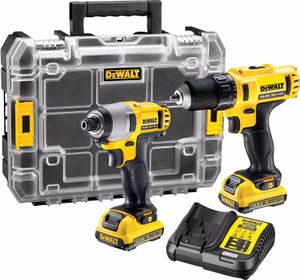
DeWalt Handdrill
This equipment is safety category 6: Other equipment with no limits.
This equipment is Noise Category 2:
Can be used at all hours, but in moderation.
Be considerate; if you feel you need to wear ear protection,
then only use the tool between 07:00 and 19:00.
To drill holes.
The drill has a clutch, so can be used to drive in screws if you must. But you probably want to use the DeWalt Impact drill/electric screwdriver - it is designed for this and gives you more control.
If you do want to use the drill - then make sure that you
- set the torque limiter to some sensible value (certainly not on 'drill'!)
- you apply enough pressure on the screw to keep it from stripping.
- Also make sure you apply the pressure straight (i.e. not through the handle - but on the back) - that helps a lot.
However - if you need to apply a lot of pressure - then use the DeWalt Impact drill/electric screwdriver -- as you end up ruining the drill if you do not. Seriously. You ruin it & a new head is about 60 Euro's. And after the second head or so - the machine is total loss.
We currently have two:
- One in the wood section - which has a slightly wobbly head due to it being used for screws.
- One in the cupboard in the metal section - which is bought especially to keep in a good state - and it should ONLY be used for drilling.
Location
Woodworkshop - in a holder on the wall near the workbench left.
Metwalworkshop - in the cupboard - not to be uses for anything but drilling. No screwing. This keeps it in a state suitable for things like small holes & tapping.
Disassembling the keyless chuck
If someone was pigheaded enough to use the drill as a screwdriver (rather than its rather excelent and specially made for this tool the DeWalt Impact drill/electric screwdriver -- you will end up with a stuck keyless chuck at some point.
In that case you need to replace it. This is done by
- Open the head all the way (seriously - all the way -- it is a very tight fit for the bold to come out; and if you unscrew the bolt while the head is in the way - something plastic snaps inside.
- Insert a torx 15 bit into the head and unscrew it CLOCKWISE -- i.e. it is a left-handed, reverse tread one half-turn.
- Before going any further - check that it clears the things inside the side; otherwise open the head further.
- It should now come out very easily; with no friction. If you feel friction - go back to the previous point and check again.
- Once the bolt is out - put the largest, long imbus/hex key into the head and tighen it.
- Then unscrew the head counter-clockwise (i.e. normal direction). This may take a small tap by a rubber/nylon mallet.
Parts
- Special screw: N092854
- Keyless chuck: N485661 (1~13mm drill chuck electric chuck quick-release chuck)
Actual tread likely to be 1/ 2-20UNF
History
- Set 1 bought by the space mid 2015
- Head replaced december 2018
- 1 new and 4 second-hand extra heads donated (dirkx)
- Replacement drill bought
- Head replaced 19 June 2020
- Set 2 bought by the space mid 2020
- New head ordered Nov 2023, middle drill currently missing, last donated head fitted to machine
