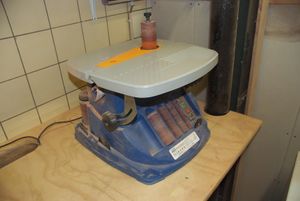
Oscillating Bobbin Sander / Contourschuurmachine
Documentation:
- https://www.youtube.com/watch?v=1RYAR111Zg8
- https://github.com/MakerSpaceLeiden/Manuals/raw/master/Houtbewerking/oscillatingsander.pdf
Inhoud
Algemeen
The bobbin sander is suitable for most types of woods as wel as other material such as (hard, thermo-harding) plastic glass -- provided that it does not `gum up' the bobbin. As it is to be primarily used for wood - contamination or use with metal is out. (If you do need it for metal; take it to the metal shop and clean the machine extensively afterwards to avoid ruining the next woodmakers work).
This equipment is safety category 4:
- In-person, instructions strongly advised but not mandatory.
- Reading, and following, the instructions on the Wiki is mandatory!
This equipment is Noise Category 2:
Can be used at all hours, but in moderation.
Be considerate; if you feel you need to wear ear protection,
then only use the tool between 07:00 and 19:00.
Opstelling
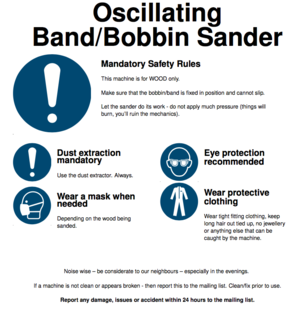
Make sure that the area around you is clear; and that nothing (including your clothing, hairs or jewelery) an be caught in the rotating parts. Be sure to connect the dust-exaction and either switch it on all the time (manual) or put it on `auto'.
Main rules and instructions
Opmerking vooraf: Het veilig gebruiken van een zaagtafel leer je niet door het lezen van de wiki en de handleidingen; maar door goede praktijkinstructie en oefening op de machine. Vraag dus om hulp en instructie wanneer nodig.
- Use hearing protection, (safety)glasses and safe clothing.
- Leave the machine clean. If it is found not clean; clean it first; or do not use it. The last person to use it is responsible for leaving it fully and completely cleaned.
- Don't leave it running unattended.
- It is mandatory to report issues, malfunctions, lack of supplies to the mailing list.
Prior to use
- Verify that the machine is clean and looks ok.
- Make sure it is wired up; and connected to the dust extraction.
- Make sure the space around it is free/clean.
- Switch the machine shortly on - to check it runs smoothly; without vibration and that the dust extraction comes on.
- Check that the sand-paper is not slipping.
- Check your material for things like old nails.
- Keep listening to the sound of the machine; it should be regular without whining or high pitches.
In case of doubt - check the manual or ASK.
Wat betreft de machine schoon en veilig achterlaten - per algemene makerspace regel is dit altijd de verantwoordelijkheid van de *laatste* gebruiker. Dus als je de troep van een ander niet wil opruimen; meld het dan - en gebruik de machine niet. Zodra je iets gebruikt ben je verantwoordelijk voor het in goede en schone staat achterlaten van de machine; en het melden van storingen of defecten.
Dangers
- Hair, loose clothing or similar getting caught and sucked in.
- Bits of machinery coming loose and flying around
- Dust and splinters in hands & eyes.
- Very high temperatures due to rubbing (rather than sanding) and smoldering wood.
Instruction
Instruction is optional - do check the video - or ask on the mailing list if you want someone to show you. This generally takes 10-15 minutes.
Issues and defects to be reported to: deelnemers@makerspaceleiden.nl within 24 hours.
Accidents (i.e. that require first aid or fire extinguishers) are to be reported at bestuur@makerspaceleiden.nl immediately.
Use
See the manual at: XX for full instructions; or the short primer below.
There are two ways to use the machine; with a round bobbin or with a short sanding belt. The first is useful for narrow corners; the latter for edges.
Using the bobbin
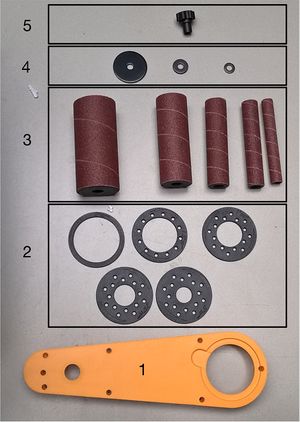
- Put the yellow plate (1) in the machine;
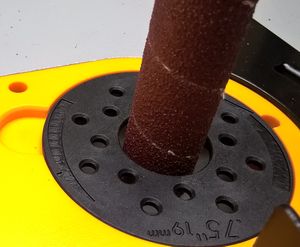
- select a spacer (2) that is a bit larger than the bobbin (3) you are to use. And slide this over the pin.
- then slide the bobbin (3) over the pin.
- pick the largest washer (4) that still fits.
- Then use the knob to tighten it all; the rubber should expand a little to 'grab' the sanding paper.
When selecting the spacer (2) - be sure that there is space around the bobbin; as it will start moving up&down.
Tasks
- Find/make Adaptor for dust extract.
- Upload pictures (currently on Yorims phone)
- Discuss if we need to fix this to the bench.
- Print safety sheet


